A feedback form in HTML is twenty lines of markup, a bit of CSS, and one decision that trips up almost everyone: what happens after the user clicks Submit?
This guide ships the full pattern. You'll get a working <form> with name, email, and message fields, CSS that styles it without a framework, JavaScript validation that doesn't break keyboard users, and three honest options for the backend, including one that needs zero server code. Paste the snippets in order, swap the action URL, and you have a live feedback form on your site in about ten minutes.
If you want to skip the code entirely, Formester's drag-and-drop builder ships a feedback form you can embed in any HTML page with one snippet. Keep reading for the hand-coded path.
What a feedback form in HTML actually needs
Four pieces, in order:
- A
<form>element with the rightactionandmethodso the browser knows where to send data. - Labeled inputs for the fields you care about (name, email, rating, message), with
nameattributes so the server can read them. - Validation on the client (for user experience) and on the server (for trust).
- A backend that receives the submission, stores it, and ideally notifies you. This is the part most tutorials skip; it's the part you need most.
Below, each piece is a separate step with a copy-paste block. The last step is a single complete file you can save as feedback.html and open in a browser.
Step 1: Set up the HTML document
Save this as feedback.html. It's the shell every form goes inside.
<!DOCTYPE html>
<html lang="en">
<head>
  <meta charset="UTF-8">
  <meta name="viewport" content="width=device-width, initial-scale=1.0">
  <title>Feedback Form</title>
</head>
<body>
  <h1>Tell us what you think</h1>
  <!-- form goes here -->
</body>
</html>
Two small things that matter later: lang="en" helps screen readers pick the right voice, and the viewport meta tag makes the form usable on phones.
Step 2: Add the form fields
Paste this inside <body>, where the comment says "form goes here":
<form id="feedback-form" action="/submit-feedback" method="post" novalidate>
  <div class="field">
    <label for="name">Name</label>
    <input type="text" id="name" name="name" autocomplete="name" required>
  </div>

  <div class="field">
    <label for="email">Email</label>
    <input type="email" id="email" name="email" autocomplete="email" required>
  </div>
  <div class="field">
    <label for="rating">How was your experience?</label>
    <select id="rating" name="rating" required>
      <option value="">Pick one</option>
      <option value="5">Loved it</option>
      <option value="4">Good</option>
      <option value="3">Okay</option>
      <option value="2">Not great</option>
      <option value="1">Bad</option>
    </select>
  </div>
  <div class="field">
    <label for="message">Your feedback</label>
    <textarea id="message" name="message" rows="5" required></textarea>
  </div>
  <button type="submit">Send feedback</button>
</form>
Three details that beginners miss:
- Every input has a matching
<label for>. Click the label, the input focuses. Screen readers read the label out loud. Skip this and the form fails accessibility and loses keyboard users. nameattributes are not cosmetic. The server reads submissions byname, soname="email"is what makes the email value reach your inbox. Missingname= silent data loss.autocomplete="name"andautocomplete="email"let browsers pre-fill from saved info. One line, measurable bump in completion.
novalidate on the form tag turns off the browser's default error bubbles so you can show your own (covered in Step 4). Drop it if you want native validation only.Step 3: Style it with CSS
Paste this inside <head> between <title> and the closing </head>:
<style>
  body {
    font-family: system-ui, -apple-system, "Segoe UI", Roboto, sans-serif;
    background: #f7f7f9;
    margin: 0;
    padding: 40px 16px;
    color: #1a1a1a;
  }
  h1 { font-size: 1.5rem; margin: 0 0 24px; text-align: center; }
  form {
    max-width: 480px;
    margin: 0 auto;
    background: #fff;
    padding: 24px;
    border-radius: 12px;
    box-shadow: 0 2px 12px rgba(0,0,0,0.06);
  }
  .field { margin-bottom: 16px; }
  label {
    display: block;
    font-weight: 600;
    font-size: 0.9rem;
    margin-bottom: 6px;
  }
  input, select, textarea {
    width: 100%;
    box-sizing: border-box;
    padding: 10px 12px;
    font: inherit;
    border: 1px solid #d0d0d6;
    border-radius: 8px;
    background: #fff;
  }
  input:focus, select:focus, textarea:focus {
    outline: 2px solid #5b6cff;
    outline-offset: 1px;
    border-color: #5b6cff;
  }
  input[aria-invalid="true"],
  select[aria-invalid="true"],
  textarea[aria-invalid="true"] {
    border-color: #d33;
  }
  .error {
    display: block;
    color: #d33;
    font-size: 0.8rem;
    margin-top: 4px;
    min-height: 1em;
  }
  button {
    width: 100%;
    padding: 12px;
    background: #5b6cff;
    color: #fff;
    font-weight: 600;
    border: none;
    border-radius: 8px;
    cursor: pointer;
  }
  button:hover { background: #4a59e0; }
</style>
Two things this stylesheet does that the typical tutorial skips:
- Keeps the focus outline visible. Default focus styles are ugly, so most tutorials remove them. Removing them breaks keyboard users. Replace, don't remove.
- Uses
system-uifor fonts, so the form inherits the host site's native typography on macOS, Windows, iOS, and Android without shipping a font file.
Step 4: Add accessible JavaScript validation
The alert-on-submit pattern works but it's the worst possible UX. This version shows inline errors, marks invalid fields for screen readers with aria-invalid, and keeps focus where the user can fix the problem.
Paste this right before </body>:
<script>
  const form = document.getElementById('feedback-form');

  function setError(input, message) {
    input.setAttribute('aria-invalid', 'true');
    let errorEl = input.parentElement.querySelector('.error');
    if (!errorEl) {
      errorEl = document.createElement('span');
      errorEl.className = 'error';
      errorEl.id = input.id + '-error';
      input.parentElement.appendChild(errorEl);
    }
    errorEl.textContent = message;
    input.setAttribute('aria-describedby', errorEl.id);
  }
  function clearError(input) {
    input.setAttribute('aria-invalid', 'false');
    const errorEl = input.parentElement.querySelector('.error');
    if (errorEl) errorEl.textContent = '';
  }
  form.addEventListener('submit', function (event) {
    let firstInvalid = null;
    [...form.querySelectorAll('input, select, textarea')].forEach((input) => {
      clearError(input);
      if (!input.value.trim()) {
        setError(input, 'This field is required.');
        firstInvalid = firstInvalid || input;
      } else if (input.type === 'email' && !/^\S+@\S+.\S+$/.test(input.value)) {
        setError(input, 'Enter a valid email address.');
        firstInvalid = firstInvalid || input;
      }
    });
    if (firstInvalid) {
      event.preventDefault();
      firstInvalid.focus();
    }
  });
</script>
What this does that the original snippet missed:
- Sets
aria-invalid="true"andaria-describedbyso screen readers announce the error. - Inserts the error message next to the field, not in a modal.
- Focuses the first invalid field on failed submit, so a keyboard user lands exactly where they need to fix.
- Doesn't trust the email regex to be perfect (it isn't); always re-validate on the server.
Step 5: Test the form locally
Open feedback.html in a browser. Run this checklist:
- Tab through every field with the keyboard. Focus should be visible at every stop.
- Try to submit empty. You should see inline error messages, focus should jump to the first empty field.
- Type a malformed email. You should see "Enter a valid email address."
- Open the browser's network tab, submit a valid form. You should see a POST to
/submit-feedback. That request will currently 404 because you don't have a backend yet. Step 6 fixes that.
If you want to skip the backend setup entirely, the next step shows the Formester HTML form backend path: change one action attribute and your form starts collecting submissions.
Step 6: Wire up a backend that stores submissions
A feedback form without a backend is a dead form. The browser POSTs the data, the server returns 404, the user sees an error page, the feedback is gone. You have three real options, compared side-by-side below.
What happens after the user clicks Submit
Without a backend, a feedback form is a dead form. The browser POSTs the data, the server returns 404, the user sees an error page. Here are the three real options, ranked by how much pain each one ships with.
Path 1: mailto:
The "no server" hack that loses about half your submissions.
<!-- Opens the user's mail client -->
<form
action="mailto:you@example.com"
method="post"
enctype="text/plain">- User-action required. Browser opens a draft email. They have to click Send manually. Half won’t.
- Breaks on mobile. Many phones have no configured mail client.
- Spam-filter bait. Resulting messages are unsigned and easy to flag.
Path 2: Your own server
PHP, Node, or whatever you already run. Full control, full ownership.
// minimal Node/Express receiver
app.post('/submit-feedback', (req, res) => {
const { name, email, message } = req.body;
if (!validate(email)) return res.status(400);
db.insert({ name, email, message });
res.redirect('/thank-you');
});- You own the server. Hosting, TLS, scaling, uptime monitoring are yours.
- Spam protection is on you. Honeypot, rate limiting, CAPTCHA, all DIY.
- Maximum control. Custom logic, database, queues, webhooks however you want.
Path 3: Formester HTML form backend
One action attribute swap. No server code, no infra.
<!-- The only change vs. Path 2 -->
<form
action="https://app.formester.com/
    api/v1/forms/YOUR_ID/submissions"
method="post">- Submissions land in the dashboard. View, filter, export to PDF, push to Sheets/Slack/HubSpot.
- Spam protection built in. Honeypot plus reCAPTCHA-style checks on every submission.
- Free for 100 submissions/month. Email notifications, dashboard, integrations included. Used by 56,000+ teams.
The complete feedback form, in one file
Structure, styling, and accessible JavaScript validation in a single working file. Save as feedback.html, swap the action URL, and the form is live.
Tell us what you think
Rendered output. Keyboard-accessible focus ring on the active field, inline error slot ready, mobile-friendly layout.
<!DOCTYPE html>
<html lang="en">
<head>
<meta charset="UTF-8">
<meta name="viewport" content="width=device-width, initial-scale=1.0">
<title>Feedback Form</title>
<style>
body { font-family: system-ui, sans-serif; background: #f7f7f9; padding: 40px 16px; }
form { max-width: 480px; margin: 0 auto; background: #fff; padding: 24px; border-radius: 12px; }
.field { margin-bottom: 16px; }
label { display: block; font-weight: 600; margin-bottom: 6px; }
input, select, textarea { width: 100%; padding: 10px 12px; border: 1px solid #d0d0d6; border-radius: 8px; box-sizing: border-box; }
input:focus, select:focus, textarea:focus { outline: 2px solid #5b6cff; border-color: #5b6cff; }
[aria-invalid="true"] { border-color: #d33; }
.error { display: block; color: #d33; font-size: 0.8rem; margin-top: 4px; }
button { width: 100%; padding: 12px; background: #5b6cff; color: #fff; font-weight: 600; border: none; border-radius: 8px; cursor: pointer; }
</style>
</head>
<body>
<h1>Tell us what you think</h1>
<form id="feedback-form" action="https://app.formester.com/api/v1/forms/YOUR_FORM_ID/submissions" method="post" novalidate>
<div class="field">
<label for="name">Name</label>
<input type="text" id="name" name="name" autocomplete="name" required>
</div>
<div class="field">
<label for="email">Email</label>
<input type="email" id="email" name="email" autocomplete="email" required>
</div>
<div class="field">
<label for="rating">How was your experience?</label>
<select id="rating" name="rating" required>
<option value="">Pick one</option>
<option value="5">Loved it</option>
<option value="3">Okay</option>
<option value="1">Bad</option>
</select>
</div>
<div class="field">
<label for="message">Your feedback</label>
<textarea id="message" name="message" rows="5" required></textarea>
</div>
<button type="submit">Send feedback</button>
</form>

<script>
// Accessible inline validation: aria-invalid, aria-describedby, focus management
const form = document.getElementById('feedback-form');
form.addEventListener('submit', (e) => {
let firstInvalid = null;
[...form.querySelectorAll('input, select, textarea')].forEach((input) => {
const valid = input.value.trim() && (input.type !== 'email' || /^\S+@\S+.\S+$/.test(input.value));
input.setAttribute('aria-invalid', valid ? 'false' : 'true');
if (!valid && !firstInvalid) firstInvalid = input;
});
if (firstInvalid) { e.preventDefault(); firstInvalid.focus(); }
});
</script>
</body>
</html>
The action URL above points to Formester’s HTML form backend. Replace YOUR_FORM_ID with your form’s ID, or point it at your own server. Everything else stays the same.
Common mistakes that break feedback forms
mailto:as the action. Looks like the easy answer. Drops half your submissions because the user has to manually send the draft. Use a real backend.- Missing
nameattributes. The form POSTs successfully but the server gets empty fields.idis for CSS and labels;nameis what the server reads. - Removed focus outlines.
outline: noneis the most copy-pasted CSS mistake on the web. It breaks keyboard navigation. Replace the outline; don't delete it. - Client-side validation only. A user with DevTools open can submit anything. Validate on the server too.
- No spam protection. Public forms attract bots within hours. Add a honeypot field (a hidden input that bots fill and humans don't) or a CAPTCHA. Formester's backend does this automatically.
- No confirmation page or message. The user submits, the page reloads, nothing visibly changes. They submit again. Add a
<p role="status">Thanks, we got it</p>or redirect to a thank-you page.
Variants of the feedback form
The base form covers most cases. Three common variants:
Customer feedback (with rating)
Add a 1-5 star scale instead of the dropdown. The <input type="range"> works, but a row of radio buttons styled as stars is clearer for screen readers. The customer feedback form template ships this layout pre-built.
Product feedback (with feature picker)
Add a checkbox group: "Which features did you use?" with options like Onboarding, Search, Reporting. Use <fieldset><legend> around the group so screen readers announce it as one question. The feedback form templates library has a fuller version.
Employee feedback (anonymous)
Drop the name and email fields entirely. Add a "Department" dropdown and a longer text area. If you collect this through Formester, turn off IP tracking in the form settings to keep submissions genuinely anonymous. The employee feedback templates are preconfigured for this.
Accessibility checklist for an HTML feedback form
Every item below is something keyboard and screen-reader users actually hit. Skip these and a measurable chunk of your audience can’t complete the form.
Pair every label with its input
The label’s for must match the input’s id. Click the label, focus the input. Screen readers announce the label out loud. Skip this and the form fails WCAG 2.1 and loses keyboard users.
No<label>Email</label>
<input type="email">
Yes<label for="email">Email</label>
<input id="email" type="email">
Connect errors with aria-describedby
An invalid field needs aria-invalid="true" plus an aria-describedby that points at the visible error message. Screen readers then announce the error along with the field name on focus.
No<input id="email">
<span>Invalid email</span>
Yes<input id="email"
aria-invalid="true"
aria-describedby="email-error">
<span id="email-error">Invalid email</span>
Use autocomplete tokens
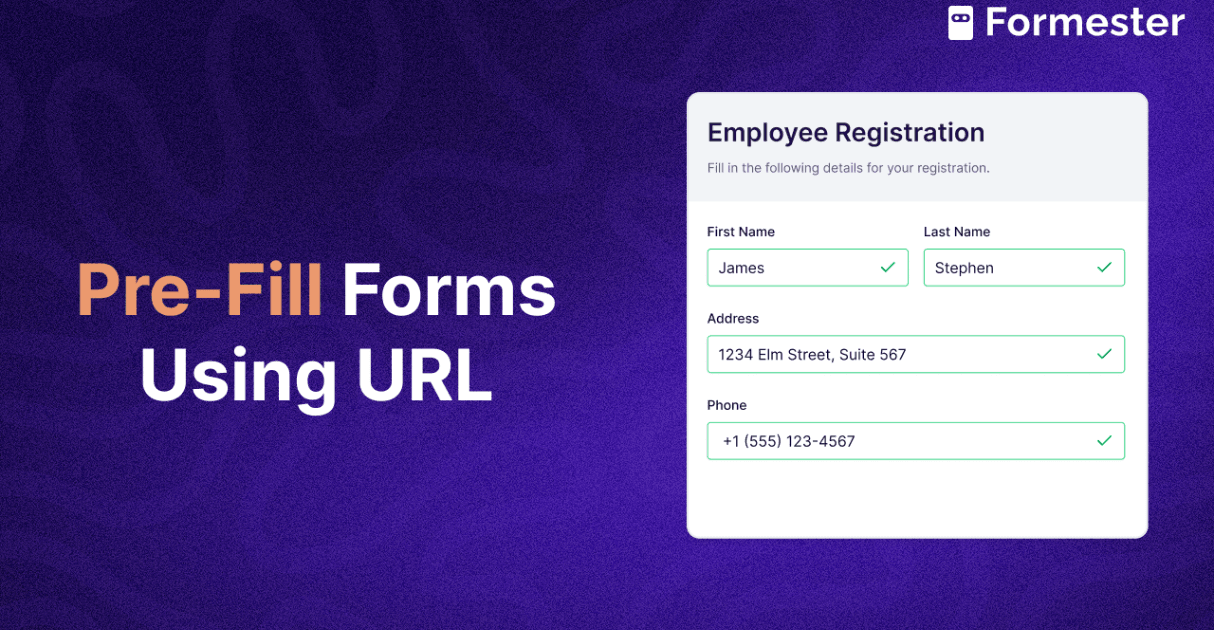
One line per field. Browsers prefill from saved info, password managers behave, and assistive tech recognizes the field’s purpose. Measurable lift in completion rate on mobile.
No<input type="text" name="name">
<input type="email" name="email">
Yes<input type="text" name="name"
autocomplete="name">
<input type="email" name="email"
autocomplete="email">
Keep focus outlines visible
outline: none is the single most-copied CSS mistake on the web. It breaks keyboard navigation. Replace the default outline, never delete it. The visible ring is how a sighted keyboard user knows where they are.
Noinput:focus { outline: none; }
Yesinput:focus {
outline: 2px solid #5b6cff;
outline-offset: 1px;
}
Mark required fields semantically
The native required attribute does two jobs at once: it tells the browser to block submission and tells screen readers the field is required. Don’t fake it with just a red asterisk in the label.
No<label>Email <span>*</span></label>
<input type="email">
Yes<label for="email">Email (required)</label>
<input id="email" type="email" required>
For edge cases (fieldsets, error summaries, custom controls), the MDN <form> reference is the canonical source.
Watch the full HTML feedback form built from scratch
Structure, CSS, accessible validation, backend swap. All six steps in one short video.
Prefer reading? The full tutorial is below with copy-paste blocks. To skip the backend setup entirely, point the form’s action at Formester’s HTML form backend.
More from Formester on HTML forms and feedback
Pair this tutorial with the backend features, ready-made templates, and adjacent how-tos.
HTML Form Backend
Oneaction swap, no server