How to Install Google Tag Manager in Formester Forms and Track Submissions
If you want to track form submissions, run ads for people who visited your form, or send data to tools like Google Analytics, installing Google Tag Manager is a smart move.
In this guide, you will learn how to add Google Tag Manager (GTM) to your Formester forms and use it to track user actions like form submissions or page views.
No coding needed. Just follow these simple steps.
What is Google Tag Manager and Why You Need It
Google Tag Manager is a free tool that lets you add tracking codes to your website or form without editing any code. These tracking codes are called tags, and you can use them to:
Track form submissions
Send events to Google Analytics
Fire Facebook Pixel for retargeting
Record user actions with tools like Hotjar
Instead of adding each tag manually, you just install one GTM code and manage everything from one place.
Step 1: Get Your GTM Code
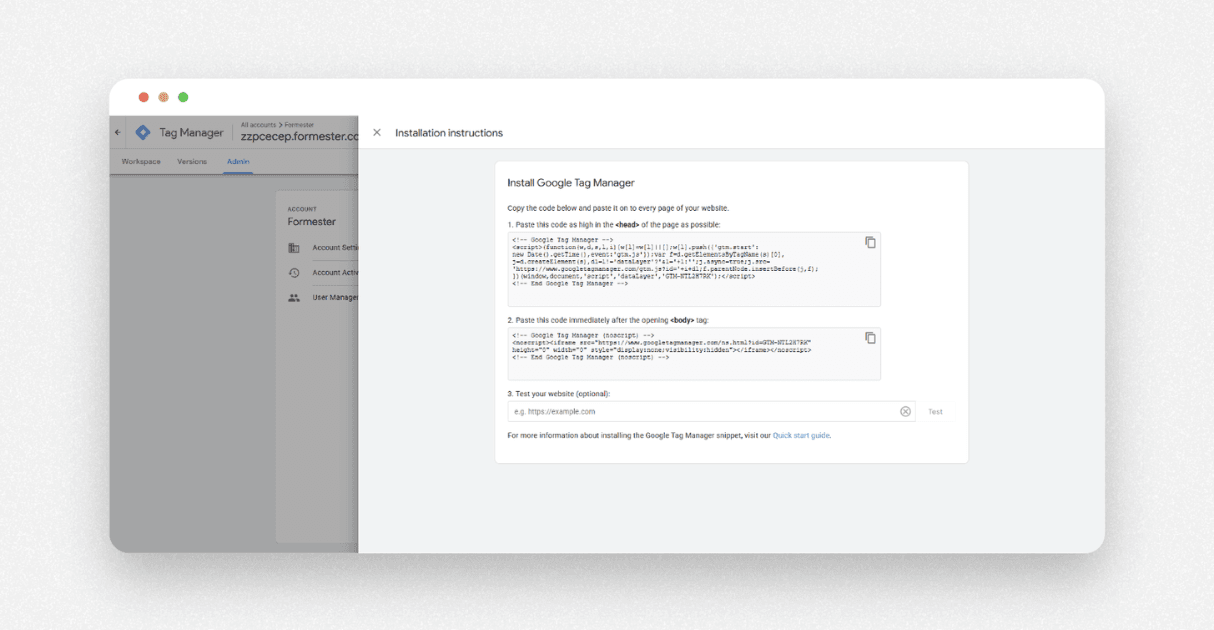
First, log in to your Google Tag Manager account.
If you do not have a container yet, create one. A container is like a folder where you keep all your tags for a website or app. Once your container is ready:
Go to the Admin tab
Click on Install Google Tag Manager
You will see two code snippets: one for the head and one for the body
Copy the head script, this is the one we will use in Formester
Step 2: Add the GTM Script to Your Formester Form
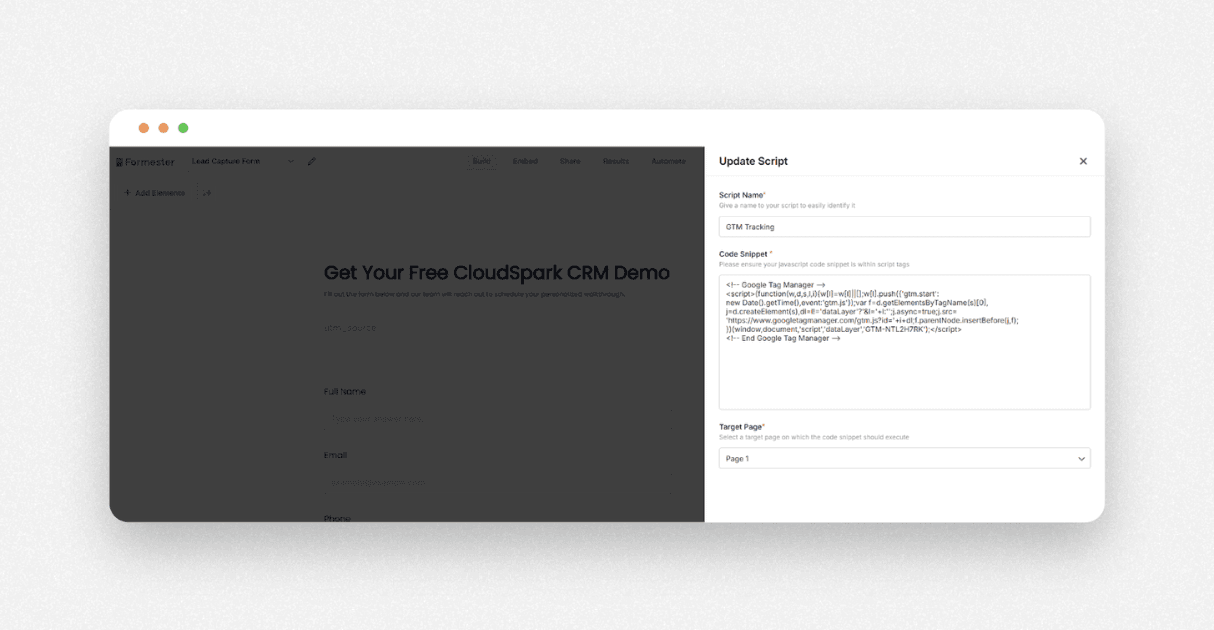
Now open your Formester dashboard and select the form you want to connect to GTM. For example, a lead capture form.
Click on Edit Form
In the builder, go to the Advanced tab
Scroll down to find the Scripts section
Click Add Script
Give your script a name (like GTM Main Tag)
Paste the GTM head script you copied earlier
Choose where the script should run:
If you select Page 1, the tag will load when the form opens
If you select Thank You Page, the tag will only fire after someone submits the form
For tracking submissions, set it to fire on the Thank You Page.
Click Create and you are done. Your form is now connected to GTM.
Step 3: Test If GTM Is Working
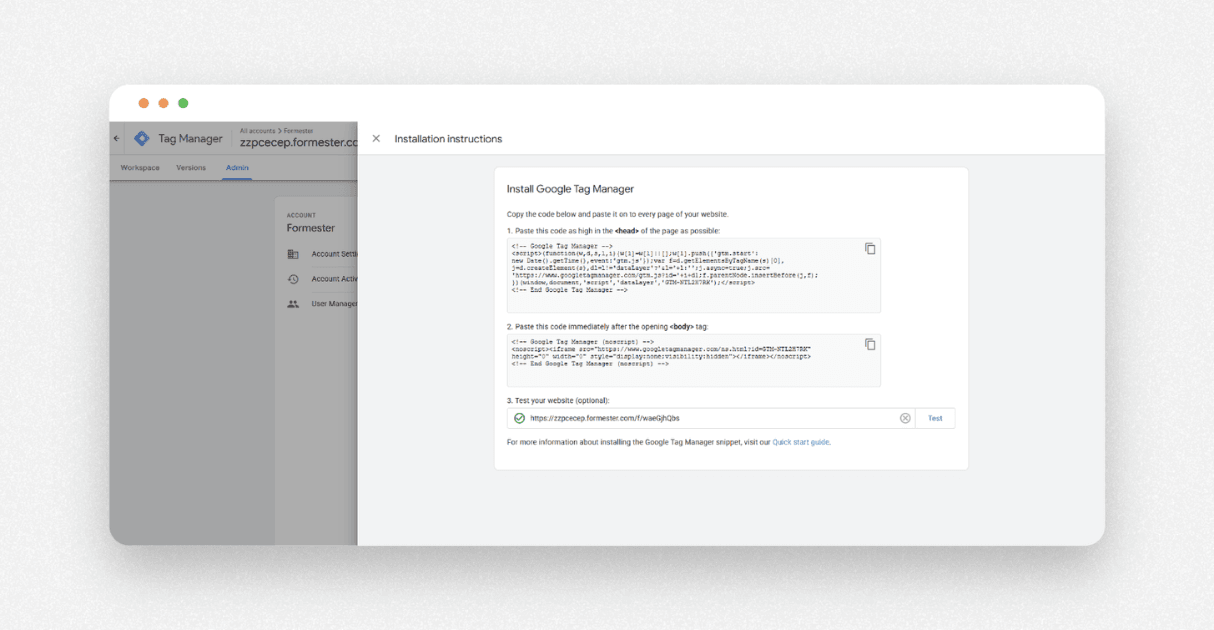
Before using it, make sure the GTM code is working.
Go back to Google Tag Manager
In the Workspace, click on Preview
Paste your form URL and click Connect
This opens the Google Tag Assistant. It lets you see which tags are active on your form.
Once the page loads, scroll or interact with your form. You will see the tag firing in the summary panel. You can also check variables like page path and source.
If you see your tag firing, it means GTM is set up correctly.
Step 4: Submit and Publish
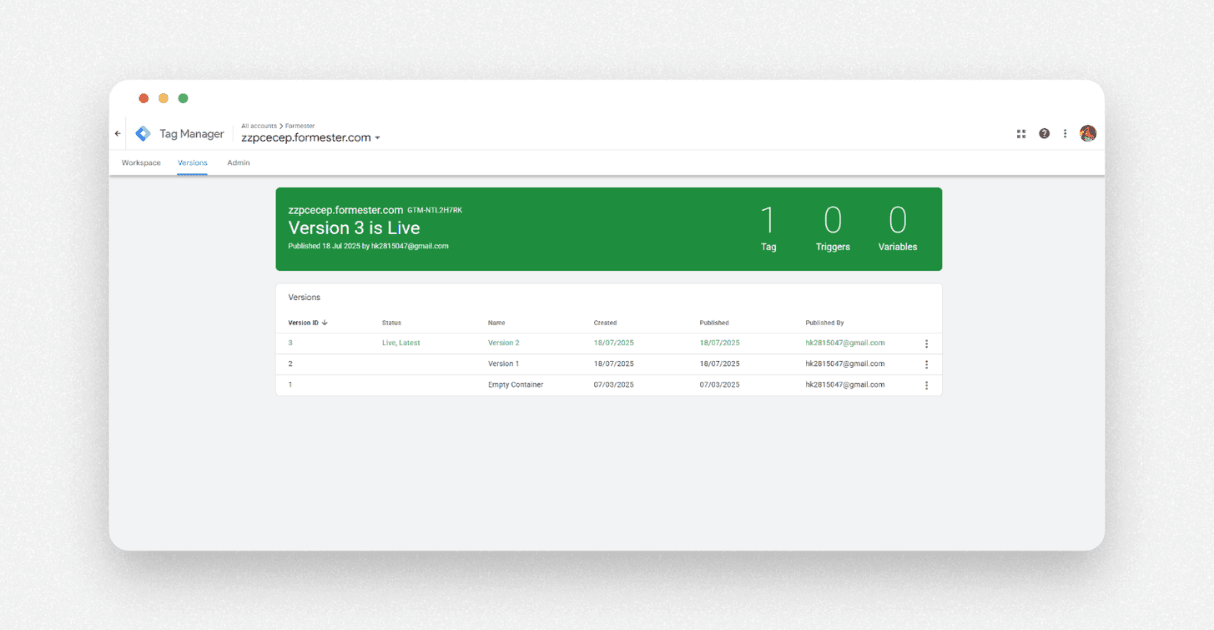 After confirming that the tag is working:
Close the Tag Assistant
Go back to your GTM workspace
Click Submit
Add a version name and click Publish
Now your GTM container is live and fully connected to your Formester form.
What You Can Do After Setting Up GTM
Once your form is connected to Google Tag Manager, you can:
Track form submissions in GA4 to measure conversions
Run retargeting ads for people who viewed the form but did not submit
Use Hotjar or other tools to see user behavior and scroll depth
Fire custom events based on page views or button clicks
You can also add more scripts inside Formester by repeating the same steps. Just paste your new code and choose the page where it should trigger.
Final Thoughts
Connecting Google Tag Manager to your Formester forms opens the door to powerful tracking and better marketing results. You can:
See how users behave on your form
Measure which campaigns drive results
Run smarter ad campaigns using custom events
You do not need a developer or a complex setup. Just add the script once and manage everything inside Google Tag Manager.