Build a Custom Registration Form with CSS
If you build websites or apps, you know how long basic tasks can take. A simple registration form can turn into hours of work. Even when you start with a registration form template, you still adjust layouts, rewrite parts, or connect it with your backend.
You have to write HTML, fix small layout issues, adjust spacing, test in different screens and many more cumbersome work.
Then you have to handle storage and spam protection. This gets even harder when the form must handle online registration for events or courses where some form of confirmation must go back to the respondent.
But you do not have to do all this by hand anymore!
You can build a custom registration form just using CSS without writing any HTML code. You can also skip building the backend and spam protection setups.
You can do all of this inside Formester - a no code form builder. It will help you create fast and clean forms for any project. In this guide you will learn to build and style registration forms with your own CSS. You can also embed these forms on your site in minutes. Finally, you will learn how to manage responses without using any outside tools or backend.
Why You Should Not Build Forms From Scratch
When you code forms yourself, you deal with tiny details that eat your time. You write HTML tags. You adjust columns. You edit form design again and again until it fits your layout.
You have to set up validation rules, fix errors, create storage systems, add fields like name, email, and phone number by hand. You even rebuild parts that could have been done with ready made form templates.
This wil slow down your project. a form builder removes all these tasks. You can simply drag and drop fields, apply built in themes, add custom CSS when you want more control.
You can also embed the form anywhere with one code snippet. or share the form itself as a dedicated URL in campaigns. And you get organized results with zero setup. This will saves you hour and helps you ship your work faster.
Step 1 - Create Your Registration Form
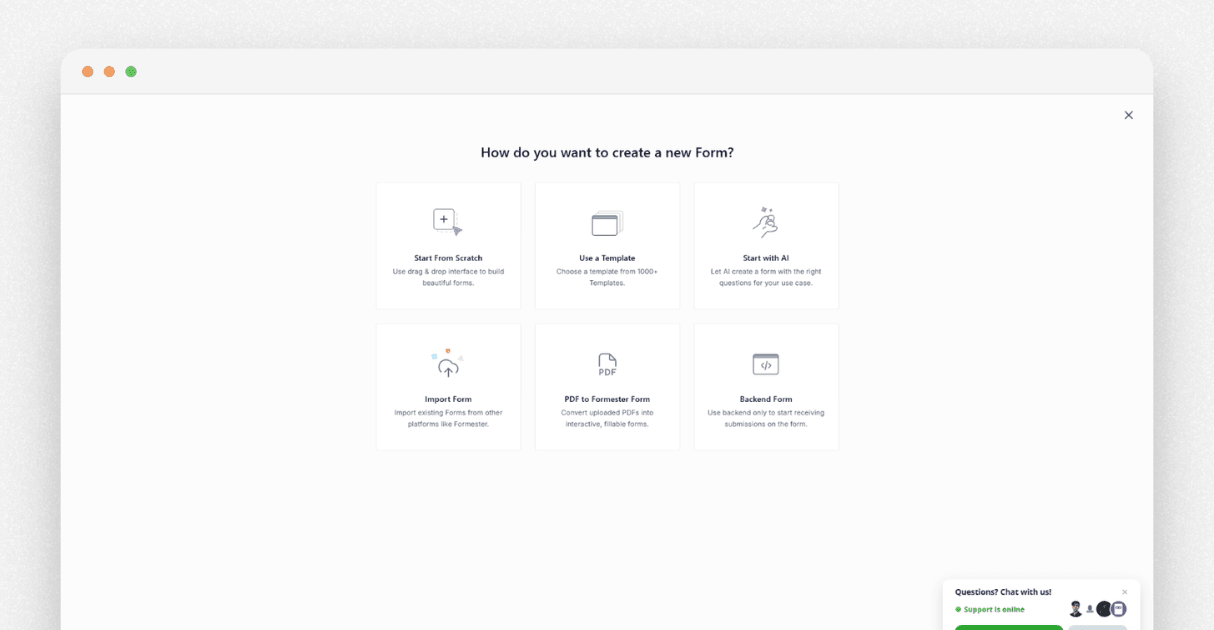
Inside Formester, click Create Form. You can build the form manually or use the AI form builder. The AI builder lets you type a short prompt like "Create a simple course registration form", and it builds the full structure for you.
Inside a typical course registration form, you need fields like:
Name
Email
Phone number
Course selection
Parent or guardian details
Confirmation checkbox
You can add all these with a click. No coding. No layout issues. If you want to start quickly, you can choose a registration form template from the library. Then, you can make it your own online registration page.
If you want to add more fields later, you can use the AI form editor. You type your request and the editor updates your form instantly.
Step 2 - Add Custom CSS to Style Your Form
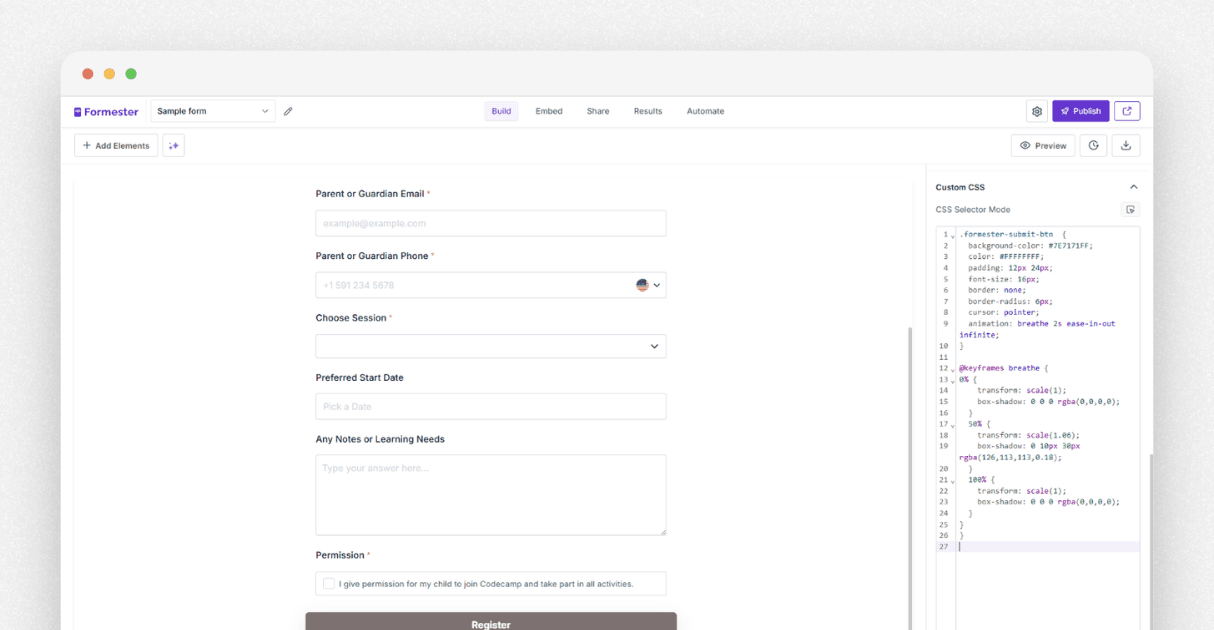 After the fields are ready, go to the Design tab. Scroll down and open the custom CSS editor. Here you can write your own CSS or paste a script you already have.
To help you get started, below are some useful CSS examples that you can copy and paste directly into your form.
Example 1
Increase the font size of all input fields. Use this if you want to improve readability.
.formester-field-wrapper input {
  font-size: 18px;
}
Example 2
Change the background color and border of all fields. This gives your form a softer and cleaner look.
.formester-field-wrapper input,
.formester-field-wrapper select,
.formester-field-wrapper textarea {
  background-color: #f8f8f8;
  border: 1px solid #ddd;
  padding: 12px;
  border-radius: 6px;
}
Example 3
Change the label color and spacing.
.formester-label {
  color: #333;
  font-size: 16px;
  margin-bottom: 6px;
}
Example 4
Add rounded corners and a card like form box. You can also wrap the entire form with a clean container effect.
.formester-form-container {
  padding: 24px;
  background-color: #ffffff;
  border-radius: 10px;
  box-shadow: 0 2px 12px rgba(0, 0, 0, 0.08);
}
Example 5
Breathing animation for the submit button. This is one of the most popular effects. It catches the user's eye and improves conversions. Replace the background and text color with the colors you want.
.formester-submit-button {
  background-color: #7E7171FF;
  color: #FFFFFFFF;
  padding: 14px 28px;
  border: none;
  border-radius: 6px;
  font-size: 18px;
  animation: breathe 2s infinite ease-in-out;
  cursor: pointer;
}

@keyframes breathe {
  0 percent {
    transform: scale(1);
  }
  50 percent {
    transform: scale(1.05);
  }
  100 percent {
    transform: scale(1);
  }
}
Example 6
Add hover effect to the submit button. Hover effects improve user engagement and makes the button feel more interactive.
.formester-submit-button:hover {
  opacity: 0.9;
  transition: 0.3s;
}
Example 7
Make the form full width on mobile. This improves mobile usability.
@media screen and (max-width: 600px) {
  .formester-form-container {
    width: 100 percent;
    padding: 18px;
  }
}
Step 3 - Use Selector Mode for Faster Styling
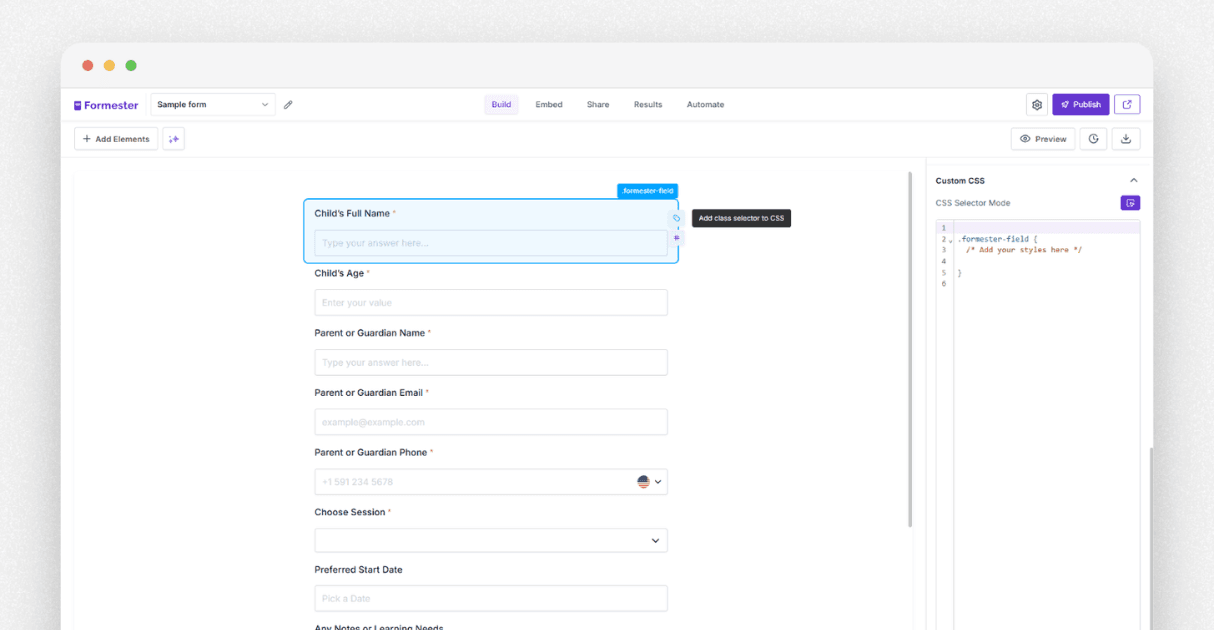
If you do not know which CSS class to target, use Formester’s selector mode. Hover over any field. You will see two choices.
Add class selector - This applies your CSS to all fields of the same type.
Add individual selector - This applies your CSS to only one field.
Once you choose your selector, the editor adds the CSS for you. You can now edit colors, fonts, spacing, borders, and animations with full control. This level of control helps you create a unique form design that matches your brand, your landing page, or your social media style.
Step 4 - Design the Form Without CSS
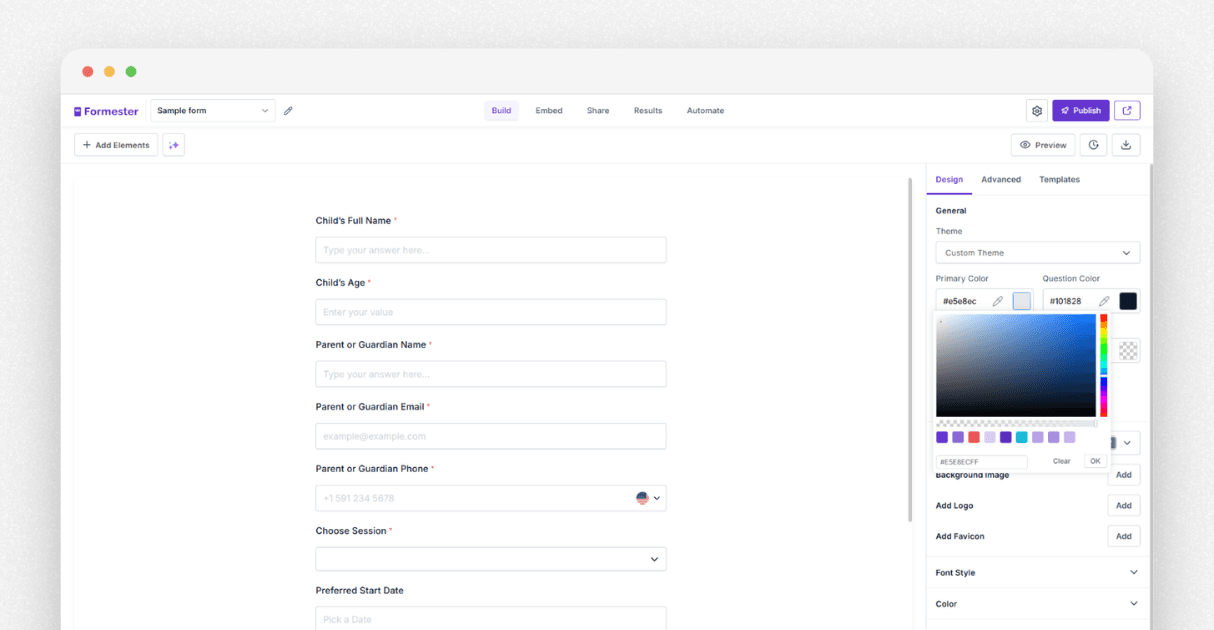
If you do not want to write CSS, you can still design your form completely. Inside the Design tab, you can change
Theme
Width
Margins
Layout
Colors
Borders
Spacing
You change everything using simple controls. When your design is ready, you can save it inside the branding kit. The branding kit lets you reuse the same design for all future forms. This gives you consistent branding across your site, landing pages, and even social media promotions.
Step 5 - Embed the Form on Your Website
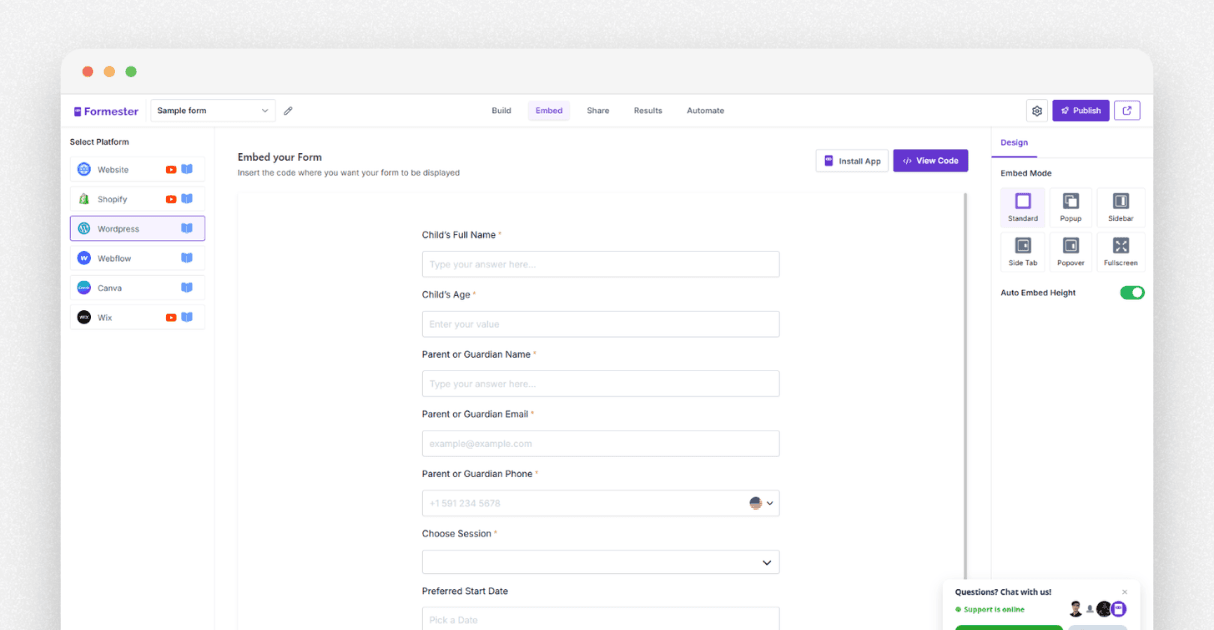
After your design is done, go to the Embed tab. You will see many publishing options.
If you use a website builder like WordPress, Webflow, Shopify, or Wix, you can install the Formester app. This lets you embed your form instantly. You can publish event forms, course forms, or any online registration form inside a few clicks.
If you use a custom site, copy the embed code and paste it into your page. Your form will show up with all your styling.
You do not need to host the form. You do not need to set up scripts. You only paste one code snippet.
Step 6 - Manage Registrations
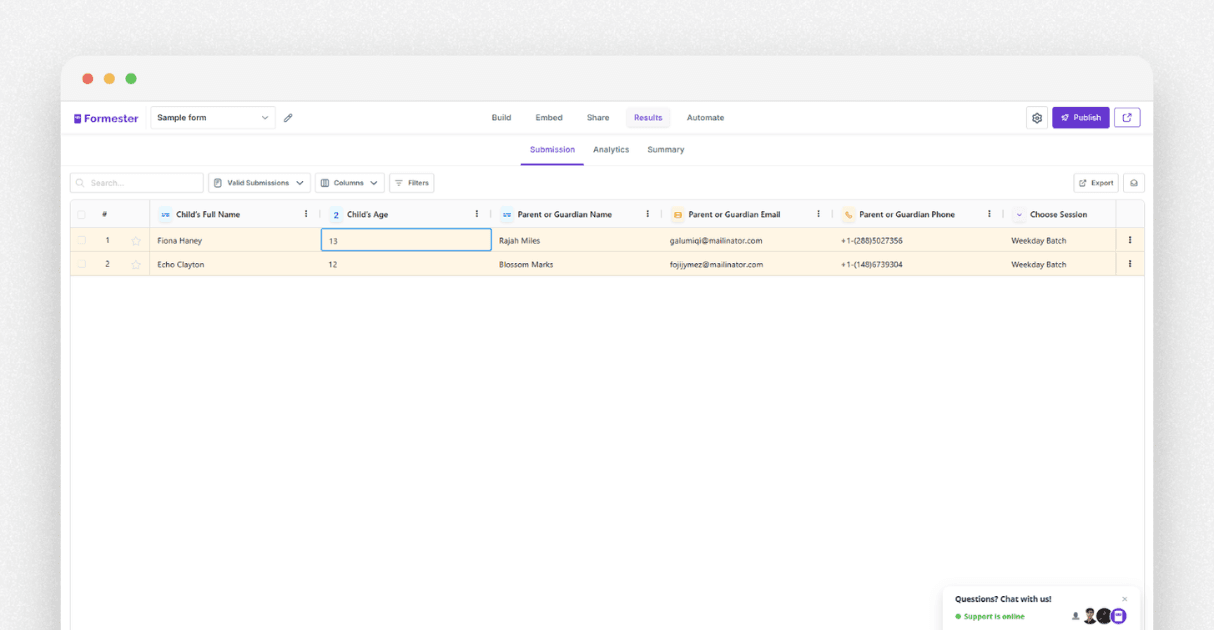
Formester saves all submissions inside the Results tab. You do not build dashboards. You do not set up storage. You do not install a database.
You can:
Filter responses,
Sort them by category,
Mark important entries,
Export data,
Send email followups.
This makes it easy to handle course registrations, event registrations, client forms, and internal requests. You do not need external tools. You handle everything inside one clean dashboard.
Step 7 - Stop Spam Submissions
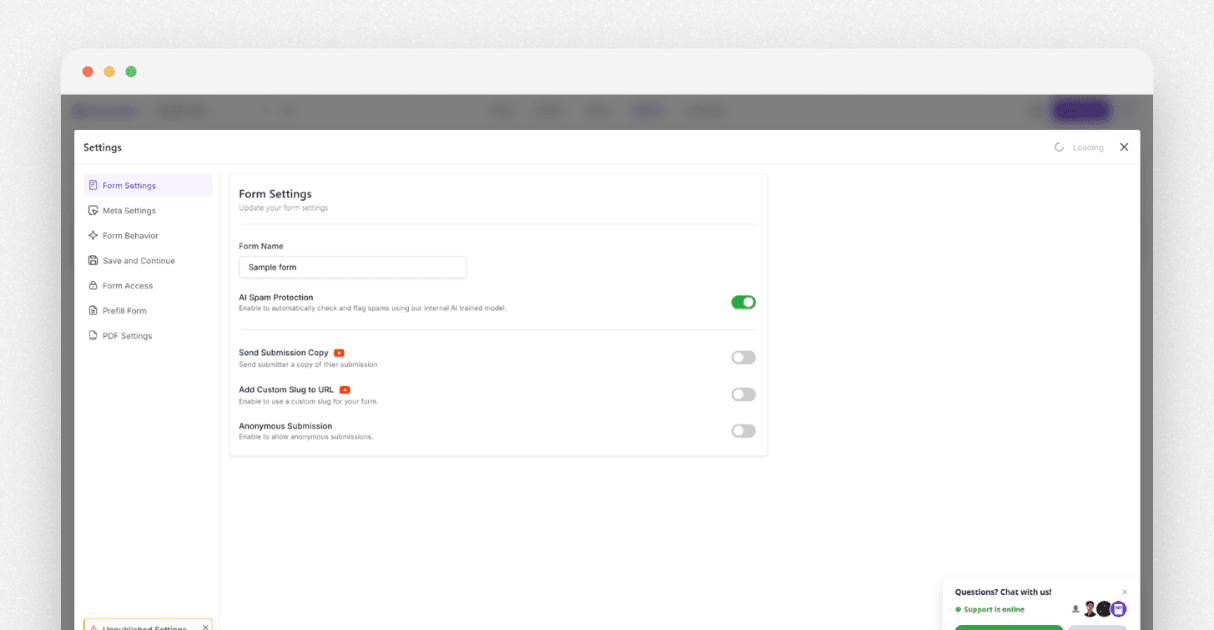
Spam entries waste your time. Formester solves this with advanced, AI powered spam protection. You toggle it on once. It filters bots and suspicious entries without adding heavy captchas.
Real users enjoy a smooth experience. You enjoy clean data.
Final Thoughts
Building registration forms should not take hours. You should spend more time on the actual project, not on basic forms. With Formester, you build the form, style it, publish it, and manage responses in minutes.
Use the CSS examples above to shape your form exactly the way you want. Add animations. Change layouts.
Adjust colors. Build clean and modern designs that match your site. You can even turn any design into a reusable template for future online registration campaigns across your site and social media.