How to Pre-fill Form Fields by URL Parameters
Filling out the same information again and again can be frustrating. Every second matters, whether a customer is returning to fill out a form or your team is making requests.
That’s where pre-filled form fields come in.
In this guide, you'll learn how to populate form fields automatically using URL parameters. This simple trick helps you speed up the form-filling process, reduce human errors, and increase your conversion rates all without writing any code.
Let’s dive in.
What Does “Pre-filling a Form” Mean?
Pre-filling means automatically loading data into form fields before the user even interacts with them. You can pre populate values like:
Name
Email
Company
Phone number
Any other custom field
You do this by modifying the form URL to include these values. When someone clicks on the customized link, the form opens with those fields already filled out.
Why Should You Pre-fill Form Fields?
Here’s why this feature is so useful:
Saves time: The user doesn’t have to retype their basic info.
Reduces errors: Fewer chances for typos or wrong entries.
Improves conversions: Less work means more submissions.
Feels personal: Pre-filled forms show you know your user.
Streamlines internal workflows: Ideal for HR, IT, and service teams.
How to Pre-fill Form Fields Using URL Parameters in Formester
Step 1: Create or Open a Form
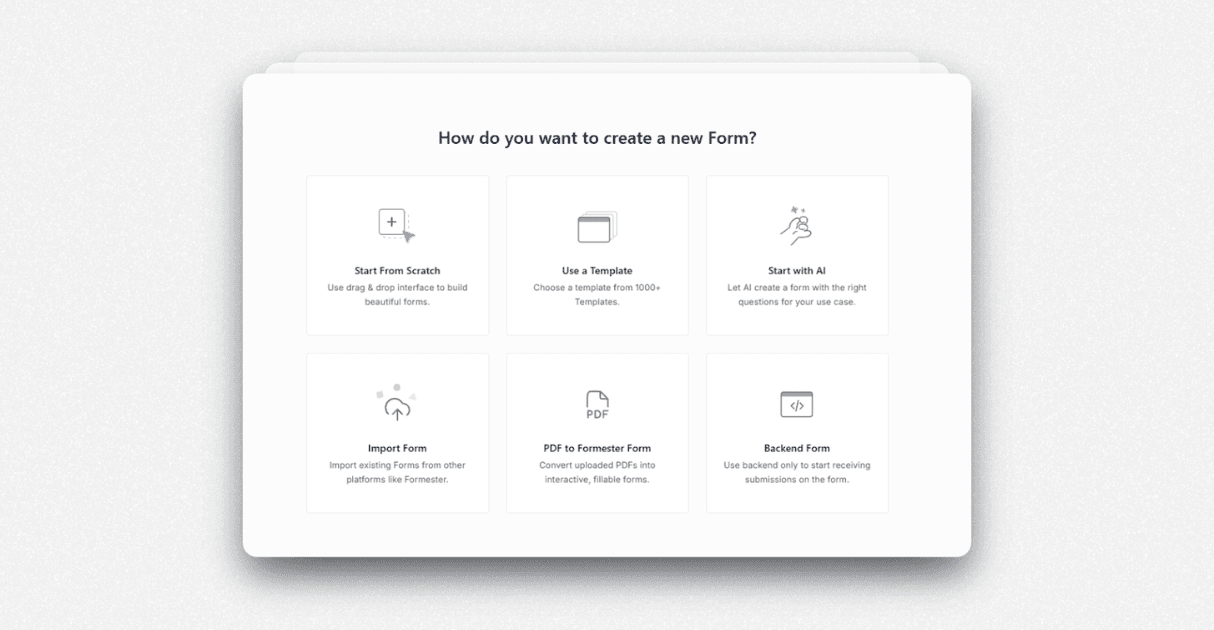
Log into your Formester account. You can either:
Build a new form using the AI Form Builder
Or open an existing form from your dashboard
Include all the field types you want to populate, like name, email, phone number, or even dropdowns and text areas.
Step 2: Double-Check Your Field Labels
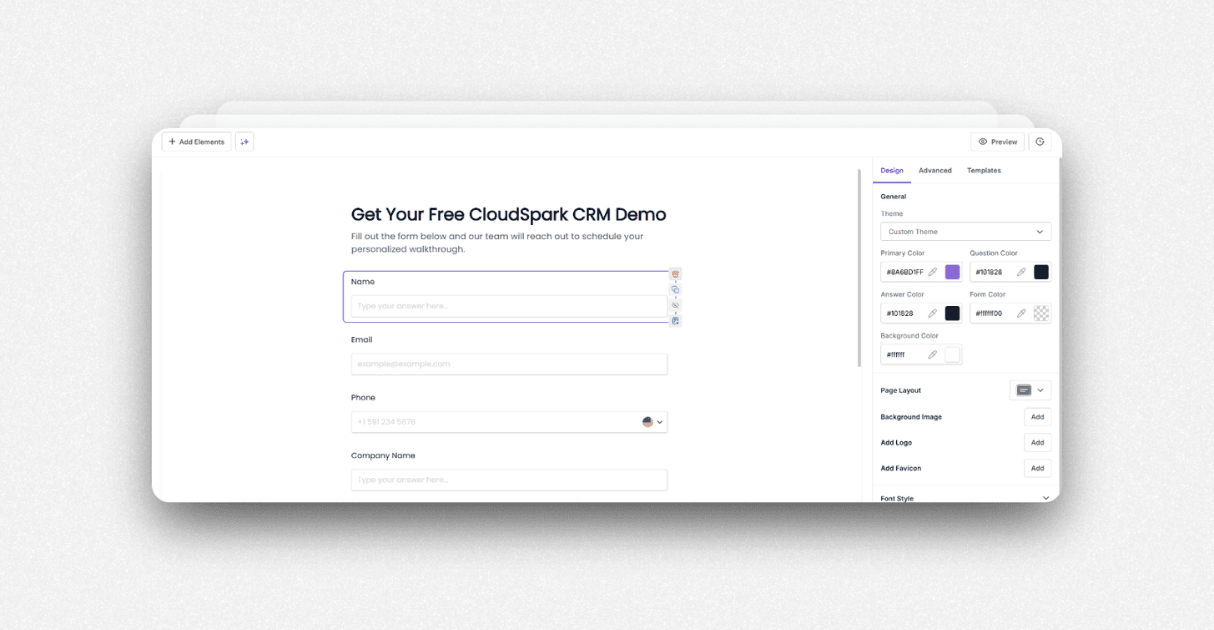
Make sure your field labels are typed correctly. The field label is what you’ll refer to in the URL parameter. If there’s a mismatch, the form won’t populate correctly.
Example:
Field label: name
URL parameter: ?name=John
You can add hidden fields to store data. This can include campaign source, UTM parameters, or user ID. These fields will not be visible to the respondent.
Step 3: Publish and Copy the Form URL
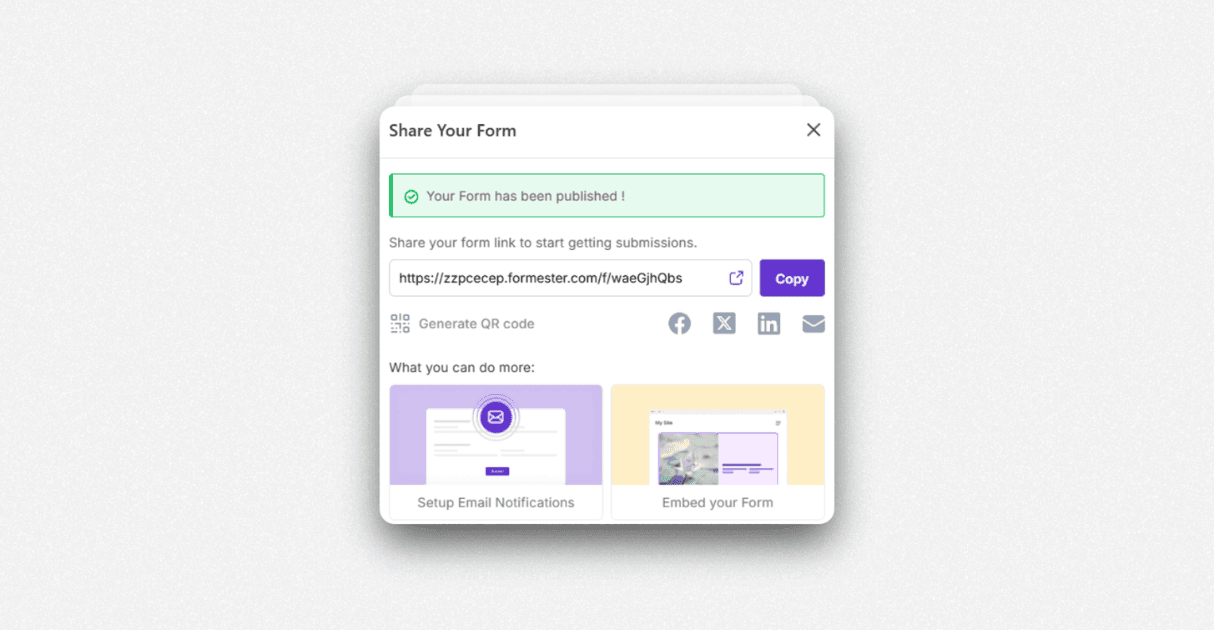
Once your form is ready, publish it and copy the form URL.
Example:
https://formester.com/templates/contact-form-template-1660/
Step 4: Add URL Parameters to Pre-populate the Form
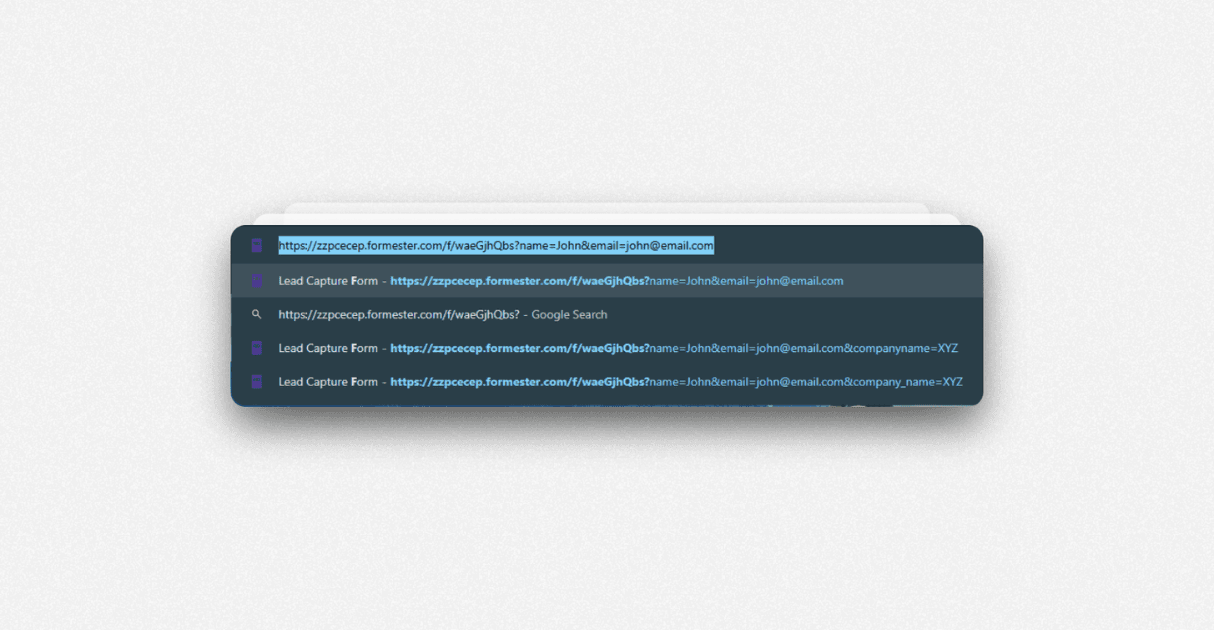
To pre populate fields, add a question mark at the end of your form URL followed by key-value pairs:
https://formester.com/forms/contact-form?name=John&email=john@email.com
Each key matches a field label, and the value is what gets filled in.
Need to go a step further? Use API powered pre-fill to pull dynamic values from your CRM or URL variables.
Step 5: Test the Link
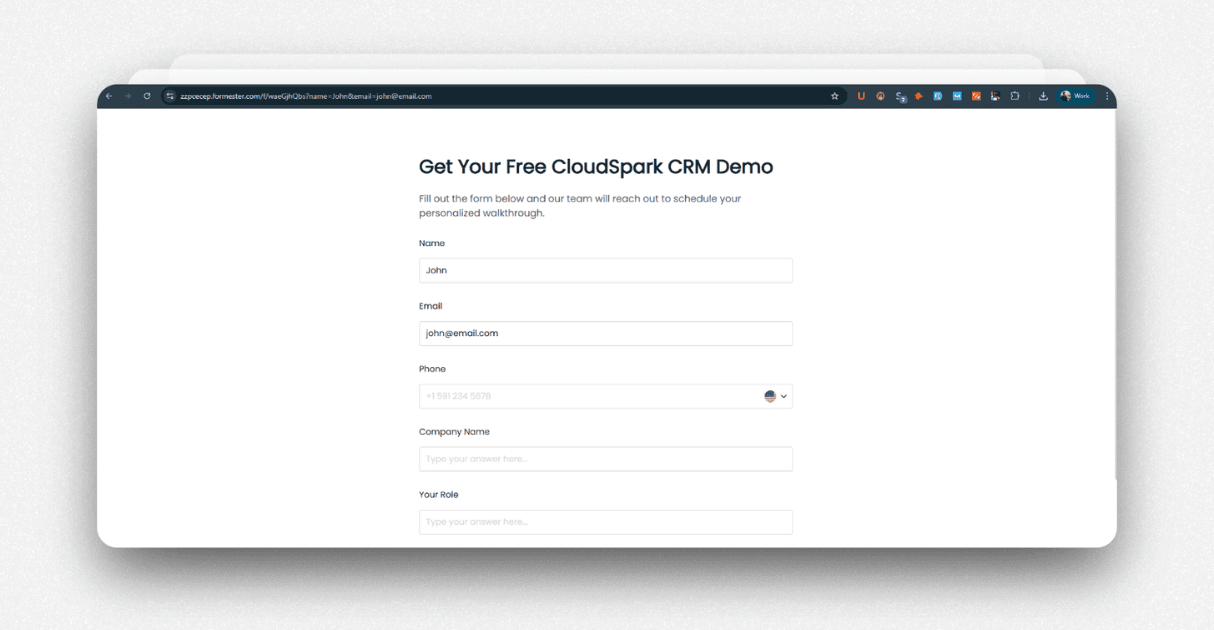
Paste the custom URL into your browser. If you set everything up properly, the form will automatically populate the fields with the values you specified.
If it doesn’t work:
Check for typos in field labels or parameter syntax.
Make sure field names and values don’t have extra spaces.
Confirm you're using the right field types and that they match the form structure.
Step 6: Share the Pre-filled Form
Once it works, you can share the custom URL with users.
This not only improves their experience but also shows you're making things easier for them. And that can lead to more engagement and submissions.
Real-World Use Cases
Here's how businesses are using URL-based pre-filled forms:
Support requests: Pre-populate the user’s email and product ID
IT or HR requests: Load team or employee info in advance
Event signups: Repeat attendees don’t have to re-enter their details
Lead forms: Insert UTM parameters into hidden fields for tracking
To improve performance, use Partial Submissions. This way, you can capture data even if users don’t finish the form.
Try It Today With Formester
Formester helps you make form creation easier. One way it does this is by pre-filling fields. This improves the user experience.
Already using our AI Form Builder? This is the perfect next step to make your forms even more efficient.
Need to control form limits? Limit form responses to cap entries by date or number.


