How to Create Online Section-Based Tests with Negative Markings
If you want to run clean and controlled online assessments, Formester gives you everything you need in one place. You can add sections, set timers, use negative marking, and even let the AI create questions for you. In this guide, you will learn how to build a complete test from start to finish using Formester.
Why You Should Create Online Assessments with Negative Marks and Timers
You can use negative marks and timers to keep your assessments fair and focused. A timer reduces cheating and pushes students to think clearly under pressure. Negative marking stops guesswork and shows you what they actually know. Together, they give you cleaner scores, stronger insights, and a more controlled testing environment. If you want results you can trust, these two features make your assessments more accurate and meaningful.
Step 1. Create Sections for Each Subject
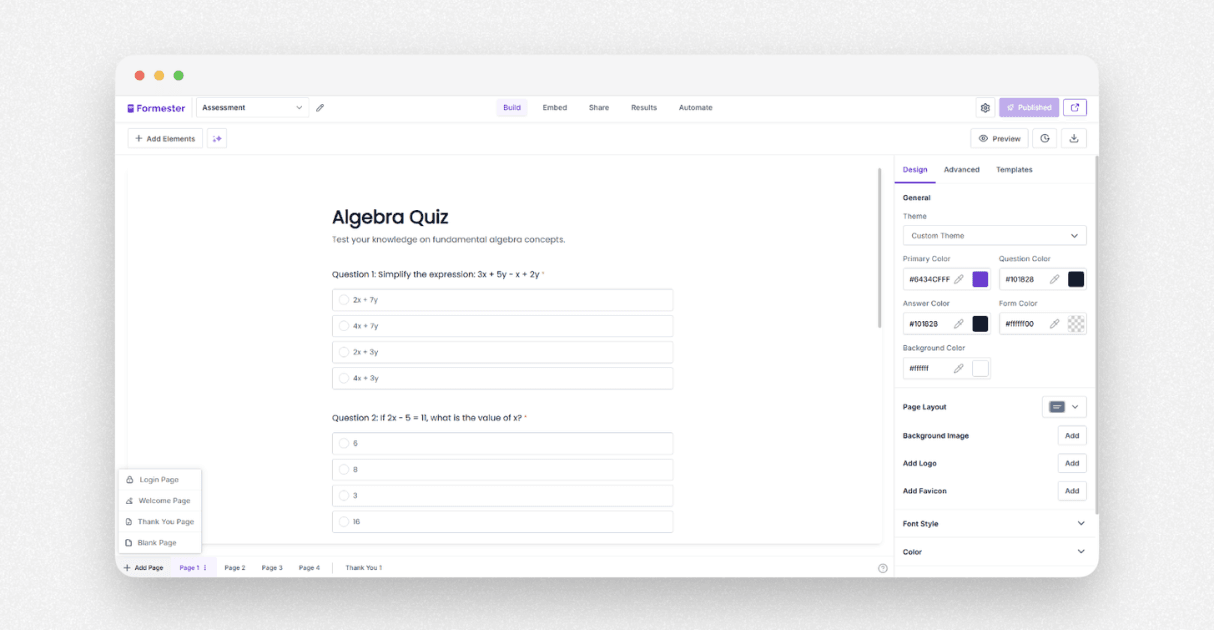
Start by creating a new test in Formester. For this sample test, create four sections. One for math, one for science, one for English, and one for reasoning. Each section will live on its own page so your students can focus on one subject at a time.
When you open each page, you can add all your questions in that section. You do not have to write every question and answer by hand. Formester has AI quiz maker to help you create questions and answers in seconds.
Step 2. Use the AI to Add Questions Fast
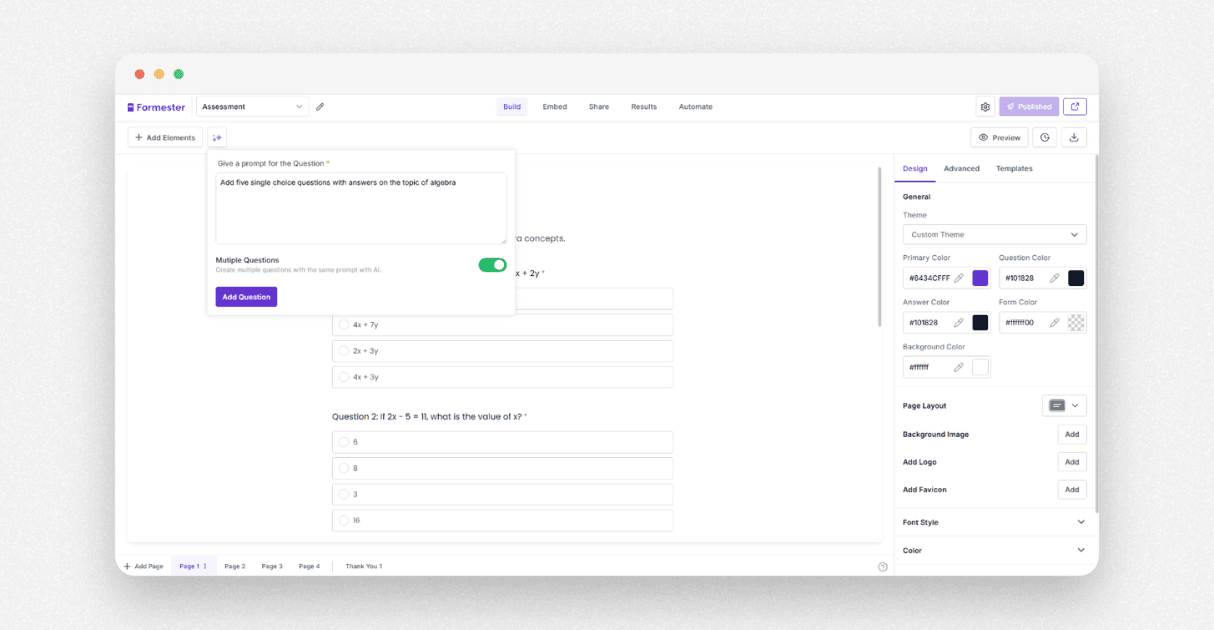
Open the AI editor. Enter a simple prompt such as "Add five single choice questions with answers on the topic of algebra". When you run the prompt, the AI will generate all the questions and the correct answers inside your test.
You can edit the field label, change the options, make a question required, or switch the question type to single choice or multiple choice. When you are done reviewing the questions, accept the changes.
Repeat this process for the rest of your subjects. For example, you can tell the AI to create five questions on environmental science. It will fill them in for you in a few seconds.
Step 3. Add Helpful Extras
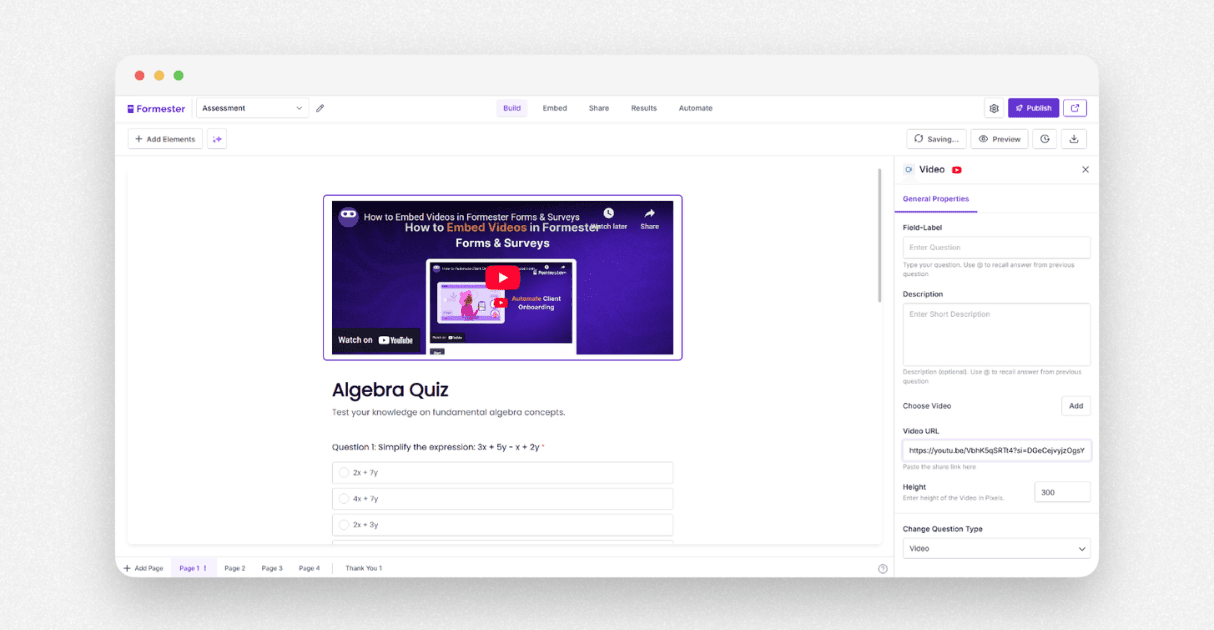
If you teach live classes, you can embed your lecture video right inside the test using the video field. This helps you check how well students understood the lesson before they attempt the quiz.
Step 4. Set Up Your Scoring System
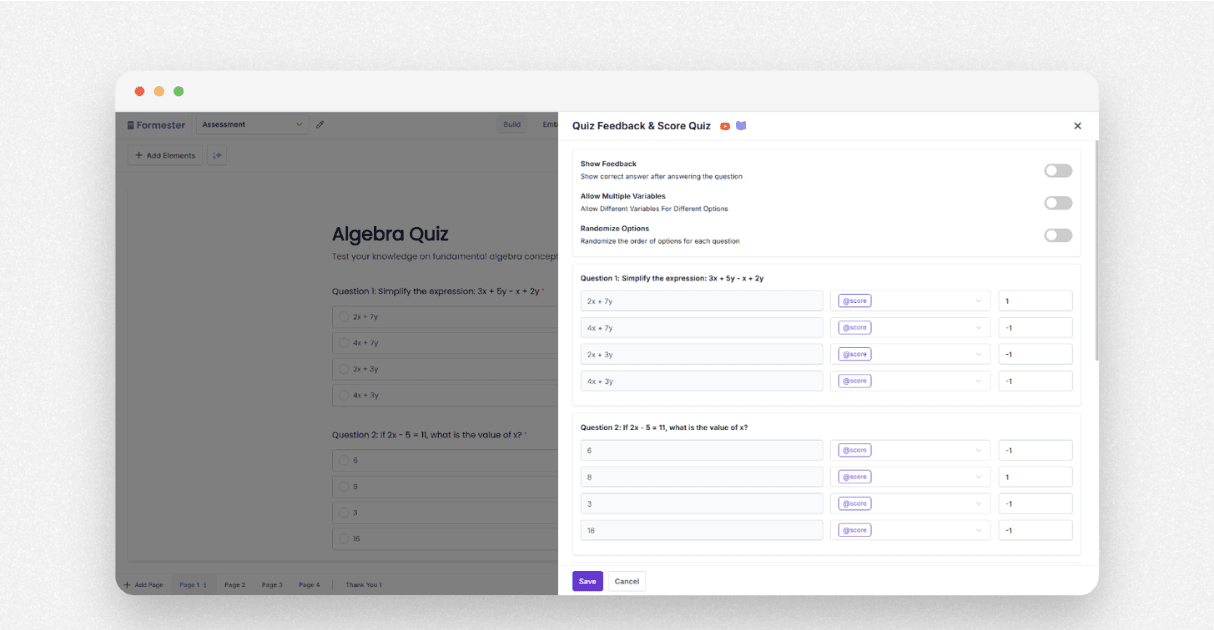
Now it is time to add positive and negative scoring. Go to the Advanced tab and open Score Quiz. You will see each question, each option, and a score variable in the middle. This score variable updates in real time based on the option the student selects.
Give one point to the correct answer. Leave the other options at zero or give them negative one if you want to use negative marking. When a student picks the right option, the score becomes one. If they pick a wrong option, the value becomes zero or negative one based on your settings.
You can also recall this score variable in other questions using the "@ symbol". You can also show the total score to the student at the end of the test.
If you want to guide your students further, you can toggle on Show Feedback. This shows them which answer is correct. If you do not want this feature, you can turn it off with one click.
Step 5. Add a Timer to the Test
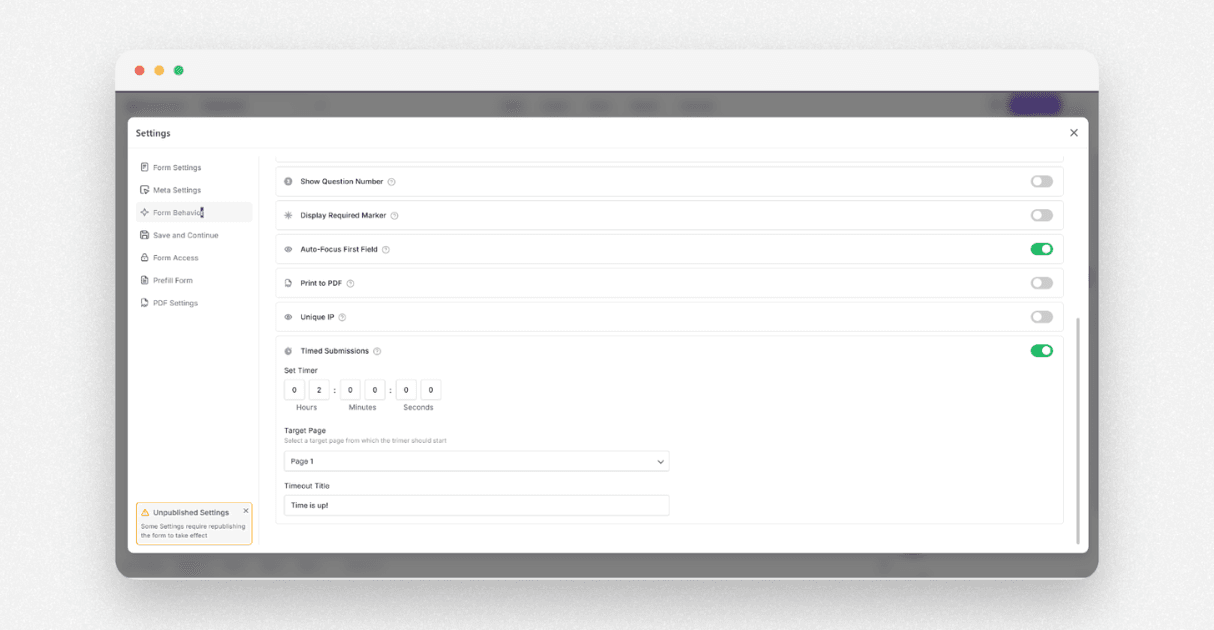
To add a timer, click the gear icon. Then open Form Behavior and scroll down to Timed Submissions. Turn it on and set the time for your test. You can choose hours, minutes, or even seconds. Also select which page starts the timer. For this example, set the timer to two hours and select page one as the starting page.
Step 6. Set Up the Final Score Display
You can show the total score to students in the thank you message. Just recall the score variable using the @ symbol. It will calculate the total score for you.
You can also create multiple thank you pages. Each page will show up based on the score range the student falls into. This gives a more personal and guided ending to the test.
Step 7. Test Your Assessment
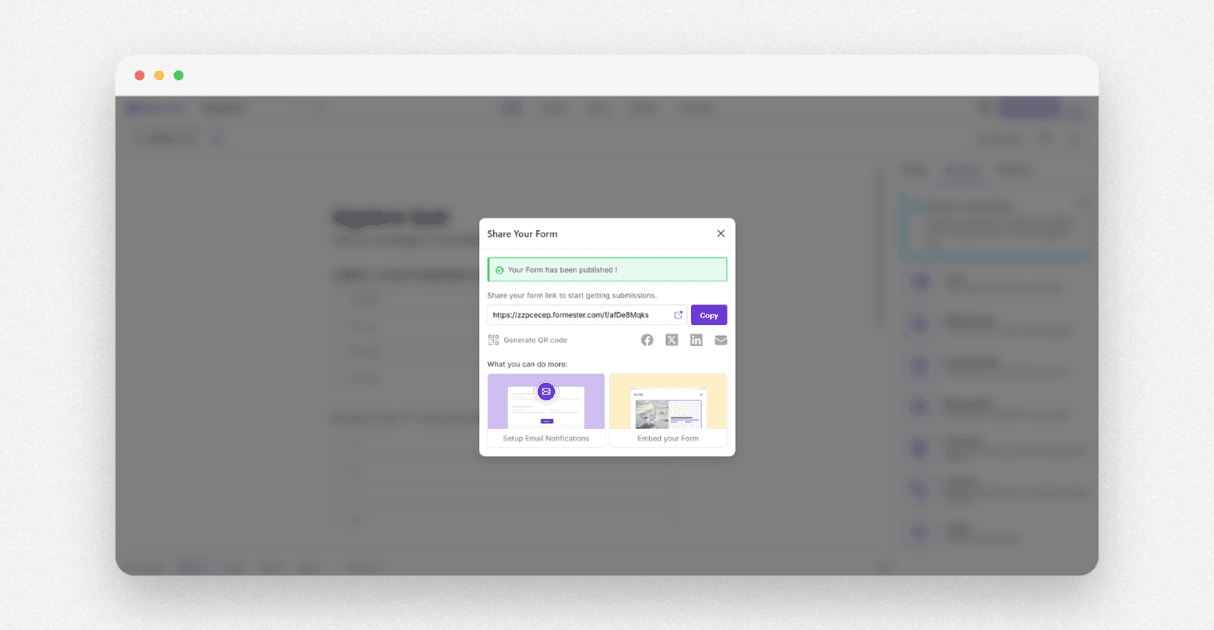
Publish your test and try a test submission. Select all the correct answers and check the final score. Then take the test again and choose a few wrong answers. You will see the score drop. This tells you the negative marking system is working.
Step 8. Review Submissions
To see all responses, open the results tab. You can also track who submitted each response by adding a small required field at the start of the test. This could be a student ID or any other unique detail you want to collect.
Final Thoughts
Building section based tests with a timer and negative marking becomes simple with Formester. You save time with AI generated questions, you stay in control with clear scoring rules, and you guide students better with smart feedback and timed assessments.
Try these steps yourself and see how smooth your assessments become with Formester.