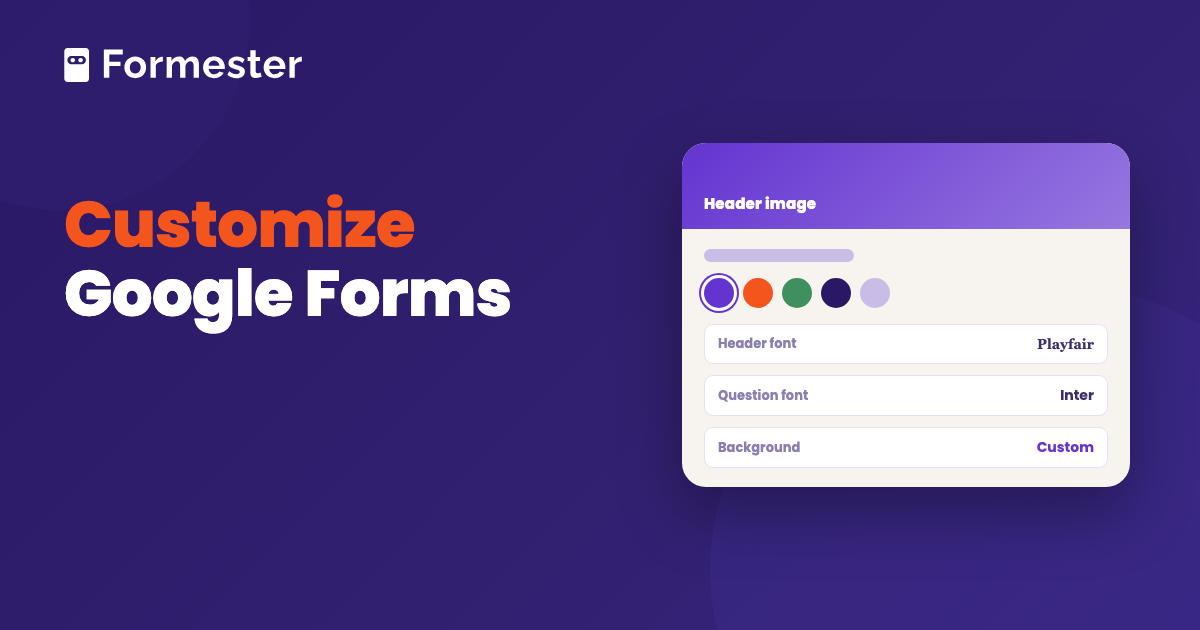
You customize Google Forms mostly from one panel. Open a form and click Customize theme. That panel holds the form's whole visual theme. A few other things can be changed elsewhere, and a longer list cannot be changed at all.
Quick answer
- You want it to stop looking generic: Customize theme, then set a header image, a theme color and the header font. It takes under a minute.
- You want your logo and your typeface: Google Forms has no logo slot and no custom fonts, so you are looking at a header image workaround.
- You want real control over the design: that means a third-party customizer tool, or a builder with a brand kit or custom CSS, because Google Forms has neither.
What does the Customize theme panel control?
The panel is titled Theme and holds four groups of settings, in this order:
- Text style, at the top: a font and a size for each of Header, Question and Text. Roboto at 24, 12 and 11 is the default.
- Header: a Choose Image button that opens the header image picker.
- Color: twelve preset swatches plus a + button for a custom color.
- Background: a short row of shades that follow the color you picked.
Organization themes are the exception to the four. Google documents a Themes section for administrator-published branding, and it appears only when an administrator has made one available, so most accounts never see it.
That is the whole panel. There is no stylesheet editor and no layout control. Google's own documentation lists the same options.
How to change the theme, color and background
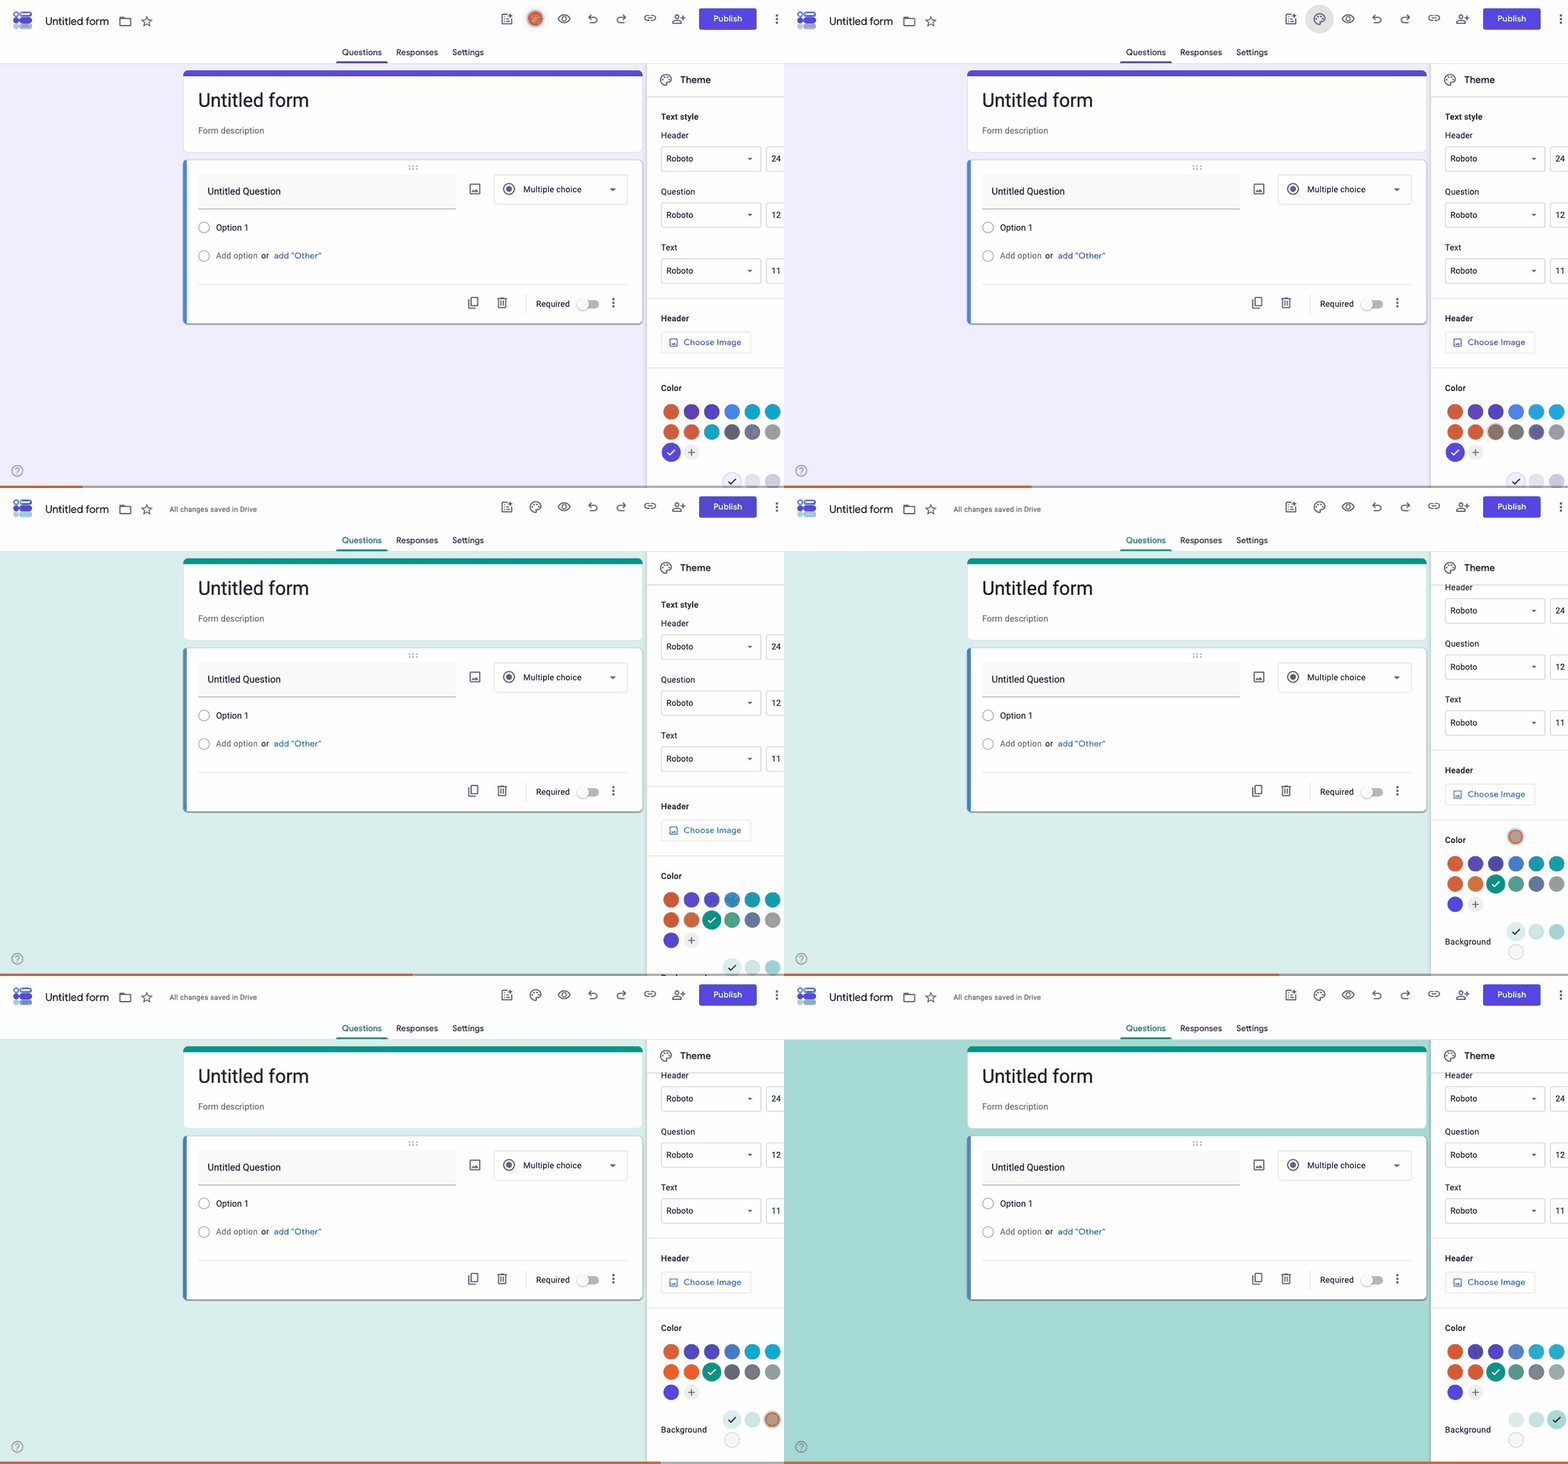
The color you pick sets which background shades the panel offers next, so work top to bottom. The form behind the panel repaints as you click:
-
Open the Theme panel
With the form open in the editor, click the palette icon in the toolbar at the top right. Its tooltip reads Customize theme and the panel that opens is titled Theme. Changes preview on the form behind it as you make them.
-
Set the color
Under Color, pick one of the twelve swatches. For an exact brand shade, click the + button beside them and enter it.
-
Set the background
Under Background, pick one of the shades. The choices change with the color above, so this comes second.
-
Close the panel
Click the X at the top of the panel. Nothing needs saving, since the form has been updating as you went.
How to add a header image to a Google Form
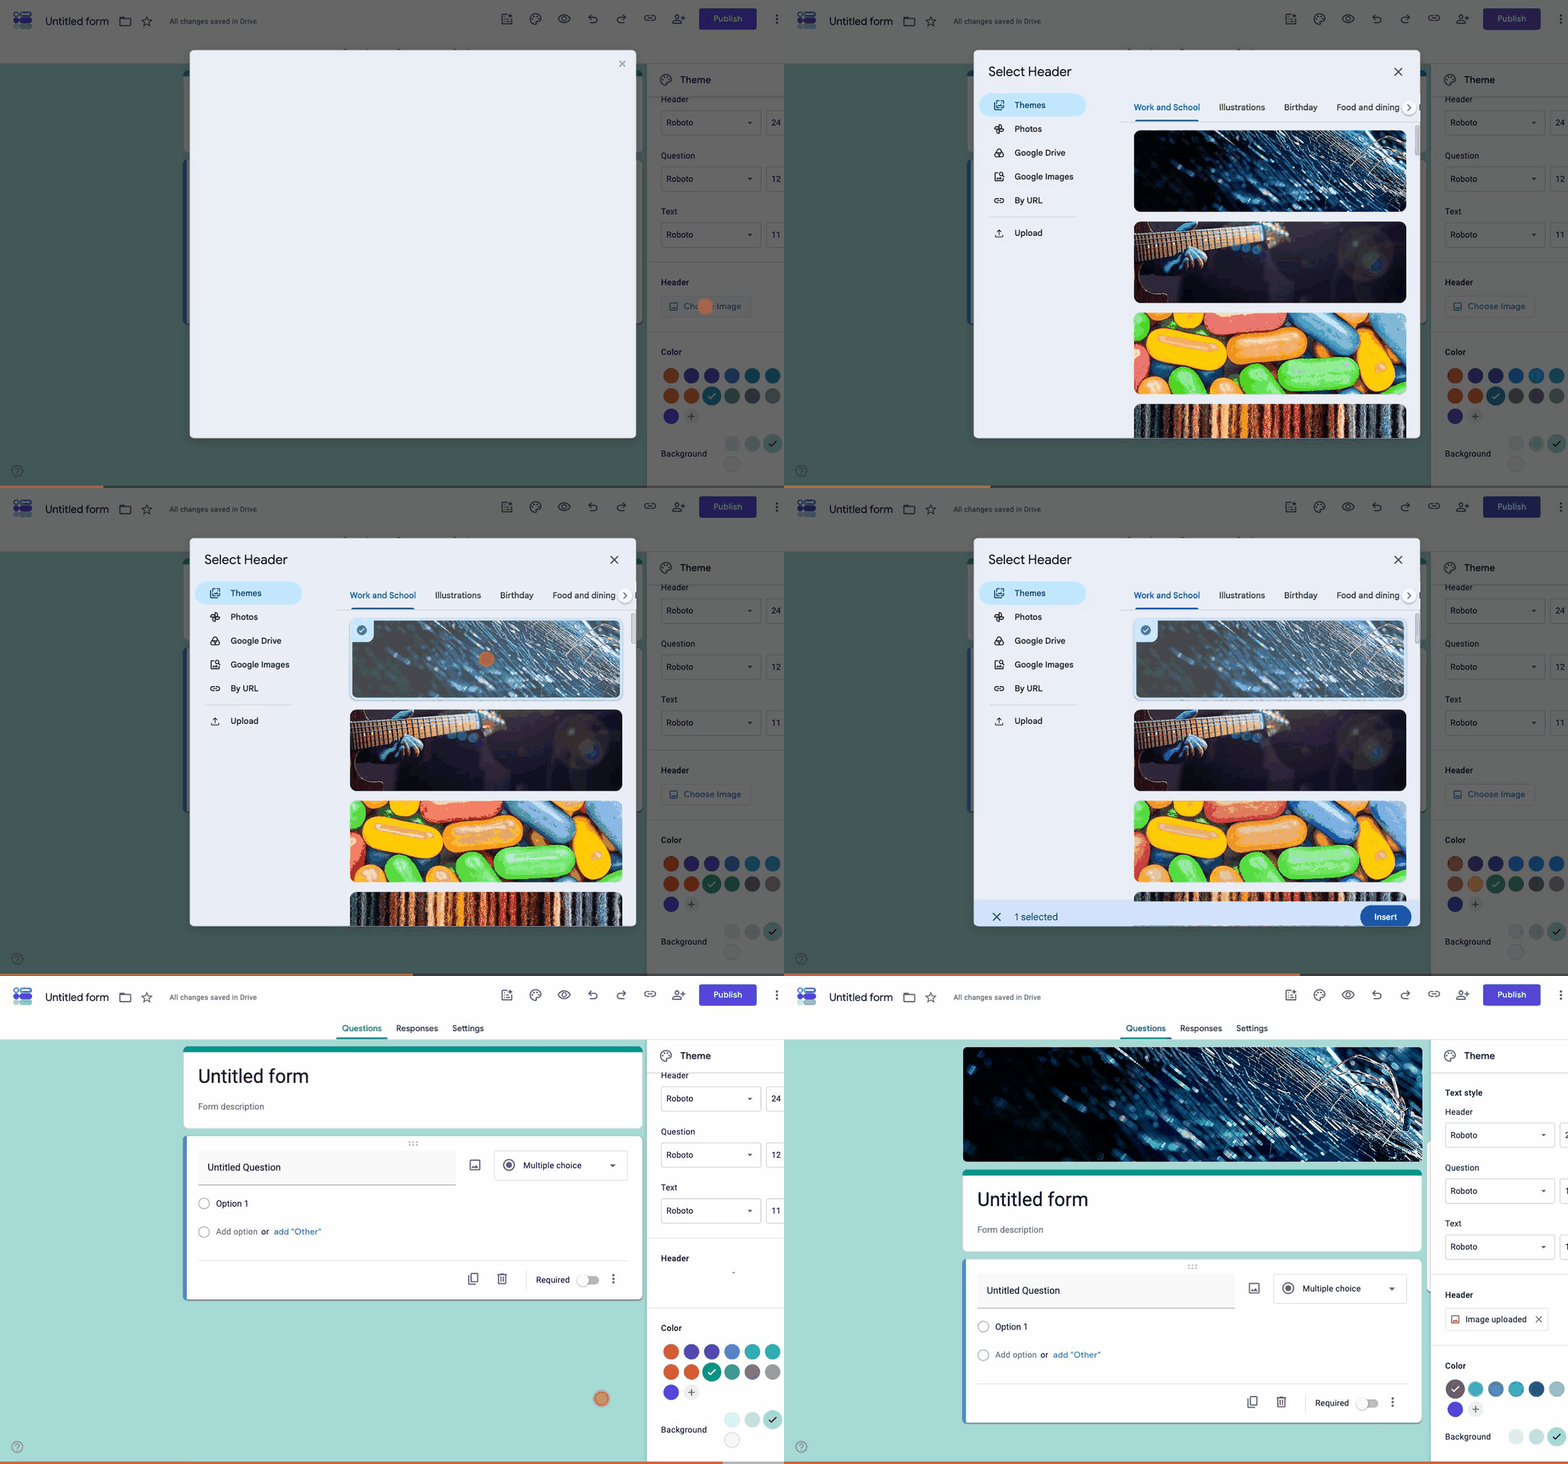
A header image replaces the plain color band at the top of the form, so it is the change people notice first. Here is the whole flow, from Choose Image to the image on the form:
-
Open the header picker
Open the Theme panel, then under Header click Choose Image.
-
Pick or upload the image
The dialog is called Select Header and it lists six sources down the left: Themes for Google's own images, sorted into tabs like Work and School and Illustrations, then Photos, Google Drive, Google Images and By URL, with Upload on its own at the bottom for a file from your computer. Choose an image and click Insert, then Save. Uploading your own file runs through Browse and then Save instead.
-
Crop the image
Click the header image and choose Reposition Header Image, drag the corners of the box so the part you care about survives, then click Save. Skipping the save leaves the crop unapplied.
-
Replace the image
To swap it, click the header and choose Replace Header Image, which reopens the picker. Labels here follow Google's theme documentation.
-
Preview it on a phone
Click Preview at the top of the editor and check the form on a phone as well as a desktop, since the banner crops differently on a narrow screen.
To take a header image off again, open the Theme panel and click the X next to Image uploaded under Header. One more thing the picker does on its own: once an image is in place, the Color swatches change to a palette pulled from that image.
Google publishes no required or recommended dimensions for the header image. What matters is the shape, because the picker crops to a wide banner: a wide image survives and a square or tall one loses its top and bottom. Upload something wide and large rather than small, since a small file gets scaled up across the banner and looks soft. If your logo has to appear, put it inside that wide image with room around it.
How to change the font in Google Forms
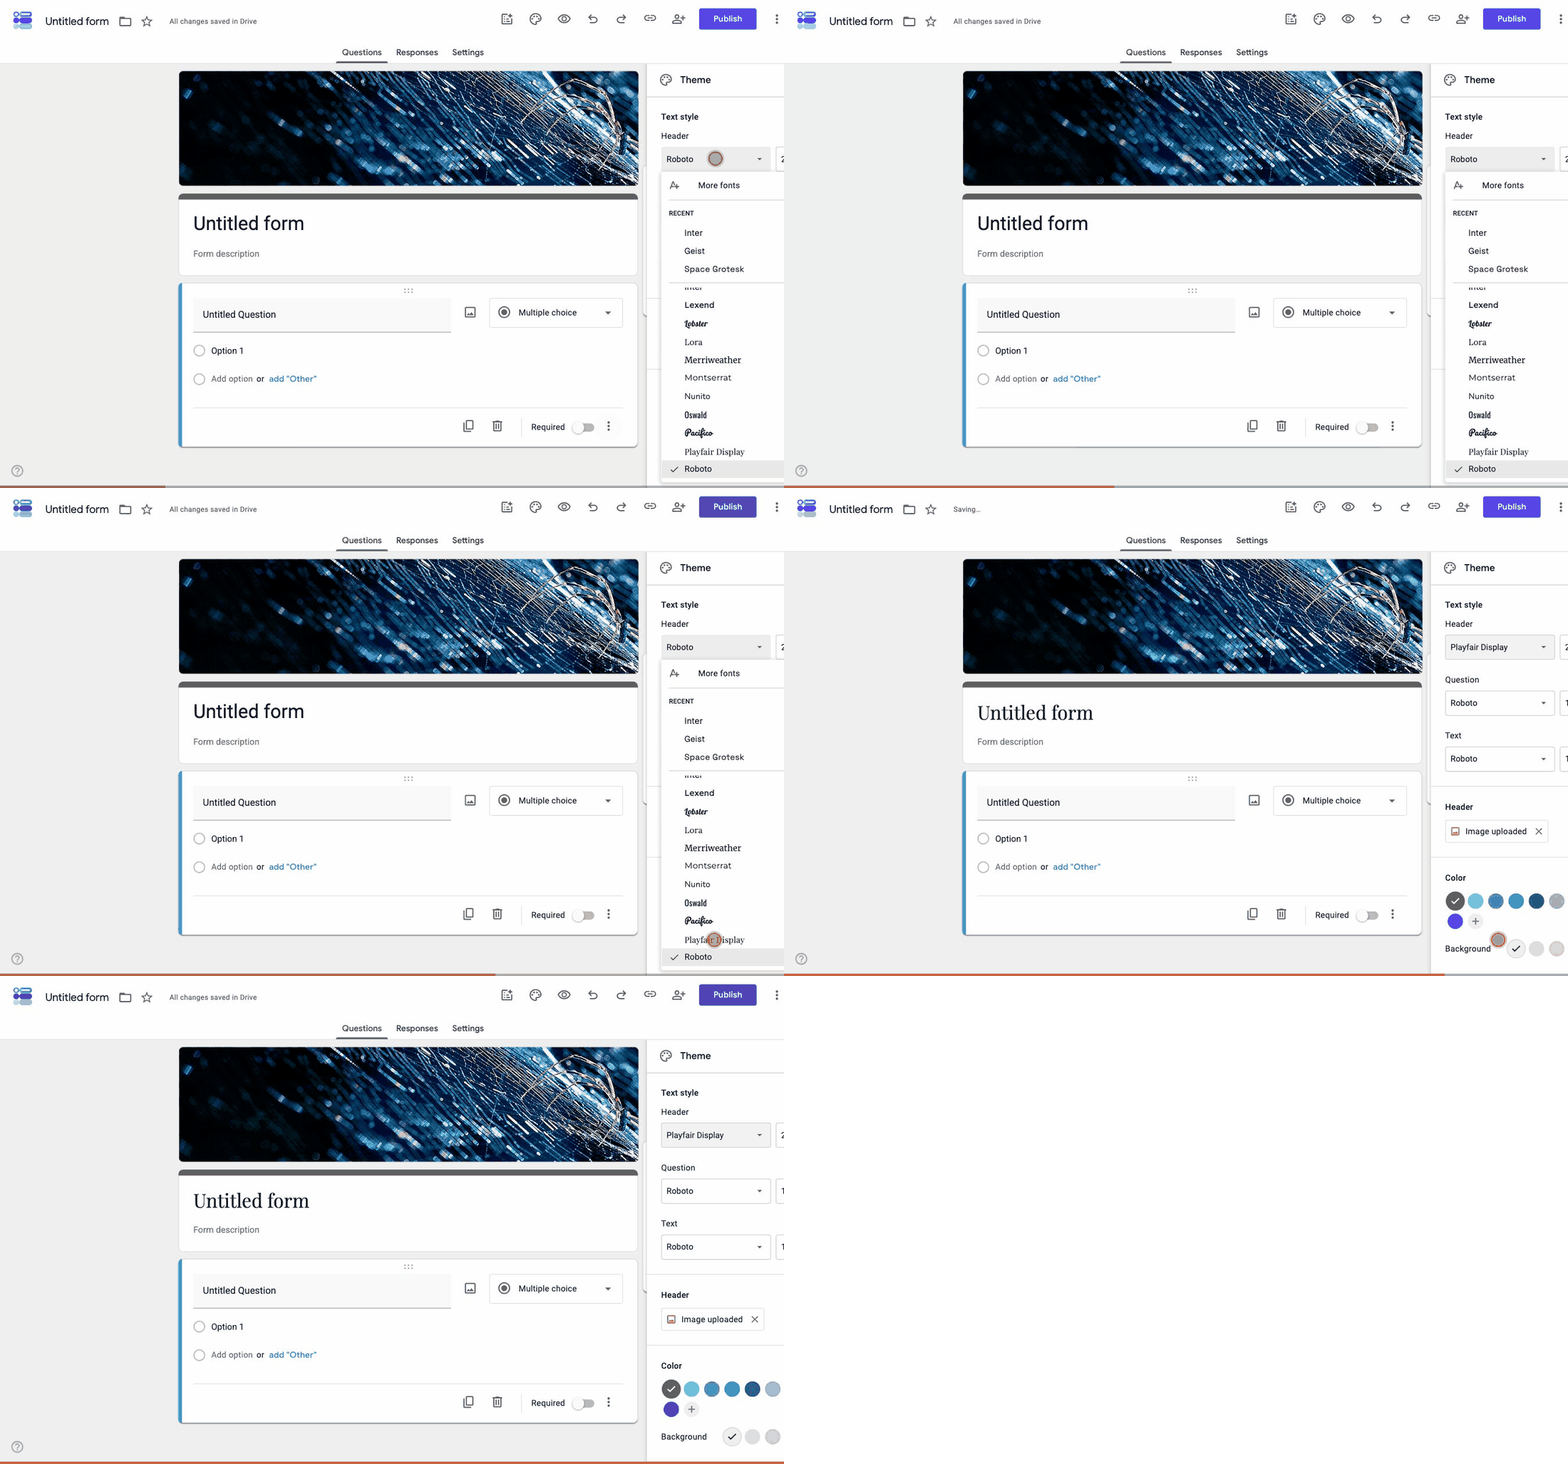
The header font is the one worth changing, since the form title is the first thing a respondent reads.
-
Open the Text section
In Customize theme, look below Text. Google splits type into three styles: headers, questions and text.
-
Pick a text style
Choose the style you want to edit, then set its font and size. Changing the header font alone is usually enough to stop a form from looking like a default.
The list is longer than it first looks. Alongside the dozen or so defaults, a More fonts option at the top of the dropdown opens the wider Google Fonts library, so Inter, Lora, Montserrat, Playfair Display and plenty more are available. What you cannot do is upload a font file of your own, so a licensed brand typeface that is not in Google Fonts stays out of reach.
How to customize the Google Form URL
The responder link is generated by Google and there is no field anywhere to rename it. Google offers a shorter version of it, and two workarounds put your own address in front.
- Google's own short link: Publish the form, check the box next to Shorten URL, then click Copy. It is still a Google address, just a shorter one. This is documented by Google.
- A third-party shortener: Run the responder link through a shortener with your own branded domain, so what you share reads cleanly in an email or on a slide.
- A redirect from your own domain: Point a subdomain or a path on your site at the form, so people see your address first and get forwarded.
Only the first is built in. The other two are redirects rather than customization, so the form still loads on a Google address and the address bar shows it once the redirect completes. Putting a form on your own subdomain outright is a different thing, and our guide to custom domains on forms covers how that works in Formester, on the Business plan.
Customization that lives outside the theme panel
A few things change the form without touching Customize theme. They sit under Settings rather than in the design panel.
- The confirmation message: The text people see after submitting is editable under Settings, then Presentation, per Google's guide. It is the one piece of copy most forms never change.
- Shuffle question order and Shuffle option order. Question order is under Settings, then Presentation. Option order is in the More menu on a single multiple choice, checkbox or dropdown question. Both change what a respondent sees, which helps on quizzes and cuts order bias in a survey.
- Images and video inside a question: You can add an image to a question or to an answer on multiple choice and checkbox questions, and place an image or a YouTube video between questions. Google documents both.
- Sections: Each section starts on a new page.
What you cannot customize in Google Forms
- The layout: One question per block, one column, fixed spacing. Sections split a form across pages and that is the only structural control there is.
- Anything that would need CSS: There is no stylesheet editor and no way to inject rules. Styling an embedded form from your own page does not work either, because it renders in an iframe served by Google.
- The look of a single field: Colors and fonts apply to the whole form, so one question cannot look different from the rest.
- The submit button on its own: The label is fixed and the color follows the theme, so there is no way to restyle or rename just that button.
- A logo, as a logo: No slot for one. The header image is the workaround, and it puts your mark in a banner rather than beside the title.
- Google's branding: The Google Forms footer line under the form stays on every published form, including embedded ones.
- A font file of your own: the dropdown reaches the Google Fonts library through More fonts, but there is no way to upload a licensed typeface that is not in it.
Google Forms is free and built for speed, and the limited design control comes with that. It only becomes a problem when the form goes in front of customers.
Third-party customizer tools
A middle route exists between Google's panel and moving the form. Third-party customizer tools re-render your Google Form outside Google's iframe, which is what lets them restyle it. Responses still arrive in the same Google Sheet.
What it costs you is another tool in the chain and a form that no longer loads only on Google, so a change at either end can break the styling. It suits a form you have already built and cannot rebuild right now.
Full control over how the form looks
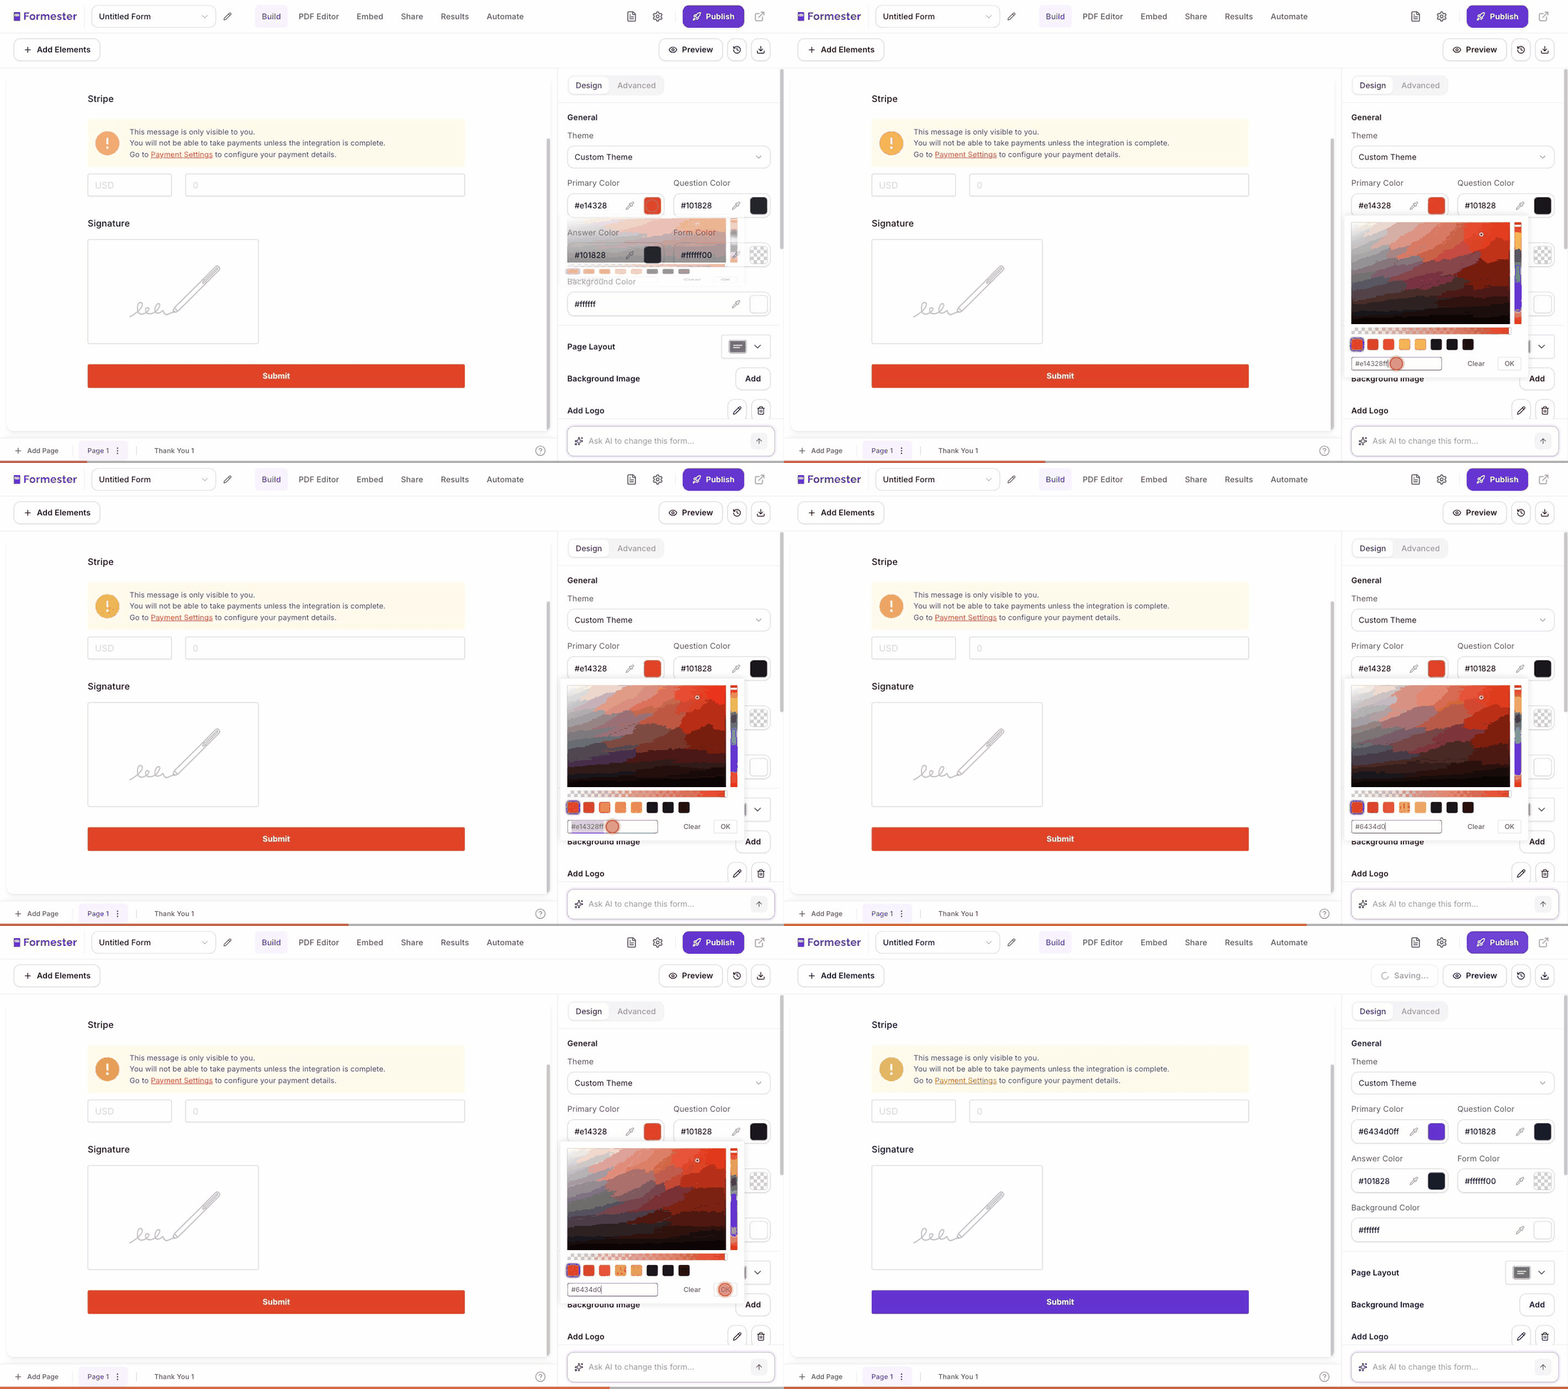
When the form is customer-facing, the questions are usually settled and the design is the part that has to change. Formester's Branding Kit holds your logo, brand colors, fonts and theme in one place and applies them to every form you build, new or existing. It also removes the Formester watermark, so the form carries your brand alone. Link your website and it will pull your logo, colors and fonts from there rather than making you enter them. The Branding Kit sits on the paid plans, starting at Personal. Watermark removal comes with it.
For control past that, custom CSS on the Business plan reaches individual elements: spacing, button shapes, field styles and animation, with a selector mode for targeting one field or the whole form, a responsive preview, plus a one-click revert when a change goes wrong.
Forms that look like your brand, not Google's
Set your logo, colors and fonts once and apply them to every form. Custom CSS when you need the finer control.
Try Formester freeFree forever · No credit card · 56,000+ teams
Related reading
- How to use Google Forms, if you are still building the form itself.
- Add sections in Google Forms, the one piece of layout control you do get.
- Embed a Google Form, and what the iframe does to your styling.