Google Forms cannot take a payment on its own. There is no payment question type, so every way of collecting money through a Google Form is something bolted on. You can send people to a checkout you already own, you can install an add-on that adds a checkout step to the form, or you can build the form somewhere that has a payment field.
Quick answer
- You want it free: paste your own Stripe or PayPal payment link into the form's confirmation message. No add-on and no platform fee.
- You want checkout attached to the form: install the Payable Forms add-on. Free on payments of $5.00 and under, 49 cents up to $50.00, 1% above that.
- You want the payment recorded with the response: use a form builder with a payment field, where people pay as they submit.
Can you add payment to a Google Form?
Not inside the form itself. Google's list of question types covers short answer, paragraph, multiple choice, checkboxes, dropdown, file upload, linear scale, rating, grids, dates and times. There is no payment type and no price field. Google's own support forum says the same thing when people ask.
So adding payment can mean three different things, and they are not equally good. Either the money moves somewhere else and you match it up later, or an add-on inserts a checkout after the respondent hits submit, or the form stops being a Google Form. Pick based on how much the money matters and how much manual work you can stand.
How to add a payment link to a Google Form
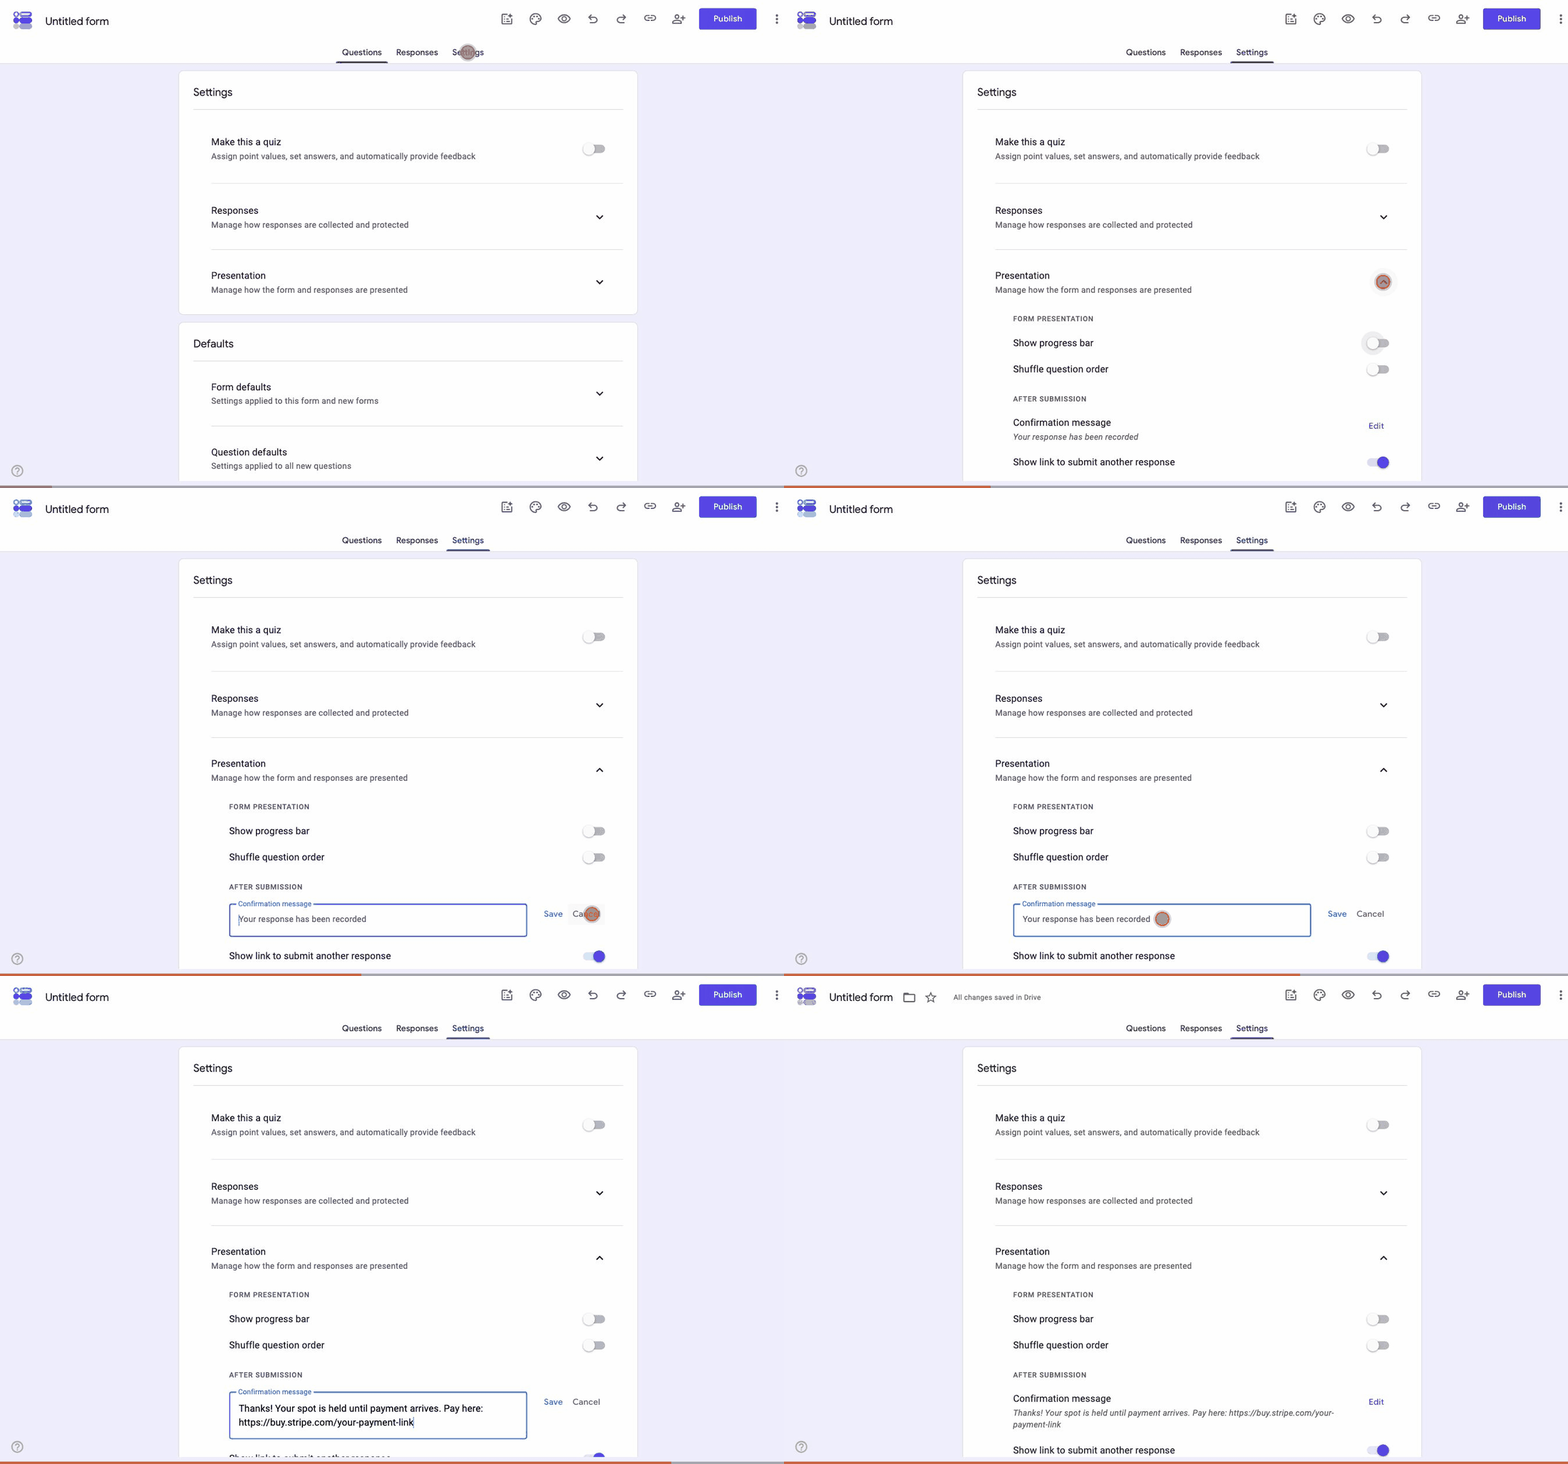
This is the free route. You create a checkout link with your payment processor, then show it to respondents the moment they submit. The whole edit takes four clicks in Google Forms:
-
Create a payment link with your processor
In Stripe, use Payment Links. In PayPal, use a PayPal.me link or a payment link from your business account. Square offers the same thing under checkout links. Set the amount, or leave it open if respondents pay different sums.
-
Paste the link into the confirmation message
In the form editor, open Settings and expand Presentation. Under After submission, click Edit next to the confirmation message. Write a line telling people the submission is not finished until they pay, then paste the link. This is the screen everyone sees after submitting, so it is the one place the link is hard to miss.
-
Repeat the link inside the form
The confirmation message is easy to close and forget. Add a short answer or checkbox question near the end that carries the same link in its description, so the payment step appears before the respondent leaves.
-
Use a QR code for anything in person
If the form gets filled in at a desk, an event table or a school gate, generate a QR code for the same payment link and add it to the form as an image, using the image button in the question toolbar. People scan and pay on their own phone, which beats typing a URL.
For informal collections, a Venmo or Cash App link works in the same slot as a Stripe or PayPal link. It keeps no record of what each payment was for, so matching payments to responses stays manual. Check the account type first. Venmo's user agreement says you can receive payments for goods and services only through a business profile, or by asking the sender to mark the payment as a purchase, so club dues and ticket money should not run through a plain personal account.
Nothing connects the payment to the response. You end up with a list of submissions in Google Forms and a separate list of payments in Stripe or PayPal, and matching them is your job. That is fine for a small event. It gets tedious pretty quickly once the list is long.
How to accept payments with the Payable Forms add-on
Payable Forms adds a checkout step after submission. The respondent fills in the form and hits submit, then sees a checkout instead of a thank-you screen.
-
Install the add-on from the Marketplace
Open the Payable Forms listing on the Google Workspace Marketplace and click Install. Then open your form, click the puzzle-piece Add-ons icon, and choose Payable Forms to open its sidebar.
-
Connect your payment processor
Payable supports PayPal, Stripe and Square. Connect the account you already use, so the money arrives where your bookkeeping expects it.
-
Set the amount
Either fix a single price for the form, or map the amount to a question so different answers cost different sums. That mapping is what makes a real order form possible.
-
Test it before sharing
Payable has a test mode. Run one submission through it and confirm the checkout appears and the payment reaches your processor's dashboard.
What it costs. Payable's fee sits on top of whatever your processor charges, and it scales with the payment size.
| Payment size | Payable's fee | Your processor's fee |
|---|---|---|
| $5.00 and under | None | Its standard rate |
| Over $5.00 to $50.00 | 49 cents per transaction | Its standard rate |
| Over $50.00 | 1% of the total | Its standard rate |
There is no subscription and no commitment, which is what makes it reasonable for a one-off event. Payable puts the processor's own cut at typically 3% to 5%, varying by provider and region, and it does not charge the respondent at checkout unless you add a handling fee yourself. Figures come from the vendor's pricing page and can change.
How to add PayPal to a Google Form
The free route is a PayPal link in the confirmation message. It costs nothing and it relies on people paying after they submit.
-
Create the PayPal link
Use a PayPal.me link for informal collections, or create a payment link in your PayPal business account when you need the payment tied to an item and a fixed price.
-
Paste it into the confirmation message
Open Settings and expand Presentation, then paste the link into the confirmation message with a line saying the submission is not complete until payment arrives.
-
Repeat it on a question near the end
Put the same link in the description of the last question, so people who close the confirmation screen have already seen it.
The paid version is PayPal inside Payable Forms. Connect PayPal as the processor and the checkout appears right after submission with the payment recorded against the response, which costs Payable's fee on top of PayPal's.
Payable states that automated payments cannot be set up as Friends and Family or peer-to-peer, so PayPal applies its standard goods and services rate. If you were counting on personal transfers to avoid the fee, that route is not available through an add-on.
How to add Stripe to a Google Form
The free route is a Stripe Payment Link in the confirmation message.
-
Create a Stripe Payment Link
In the Stripe dashboard, create a Payment Link for the product or amount. It covers cards. Apple Pay and Google Pay depend on your Stripe settings.
-
Put it in the confirmation message
Open Settings and expand Presentation, then paste the link in. Add it to the last question's description too.
Connecting Stripe inside Payable Forms is the attached version, where the checkout follows submission and the payment is tied to the response.
Stripe is usually the better pick when the form sits on a website and the buyer expects a normal card checkout. PayPal tends to win when your audience already keeps money in PayPal, which is common for community groups and schools. If you are still choosing, our comparison of online payment processing services covers the main gateways side by side.
Which Google Forms payment method should you use?
| What matters most | Use this | Cost on top of your processor |
|---|---|---|
| Spending nothing extra | Payment link in the confirmation message | Nothing |
| Payment attached to the submission | Payable Forms add-on | Free under $5.00, then 49 cents or 1% |
| Collecting in person | QR code to your checkout link | Nothing |
| Payment stored with the response by default | A form builder with a payment field | Nothing extra from the builder |
| Different prices per answer | Payable Forms, or a builder with a payment field | As above |
What Google Forms cannot do about payments
- Require payment before accepting a response: The submission is recorded the moment someone clicks submit. Payment happens after, so a response with no payment behind it is always possible.
- Issue a receipt: Google Forms sends no invoice and no payment confirmation. Whatever your processor emails is the receipt.
- Handle refunds or failed payments: Both live entirely in your processor's dashboard, disconnected from the form.
- Price items conditionally on its own: Charging more for a late registration or an extra ticket needs the add-on to map amounts to answers.
- Show payment status in the response sheet unless the add-on writes it there.
- Guarantee the add-on stays available: Every route except switching tools depends on a third party continuing to support it.
Collecting the payment in the form itself
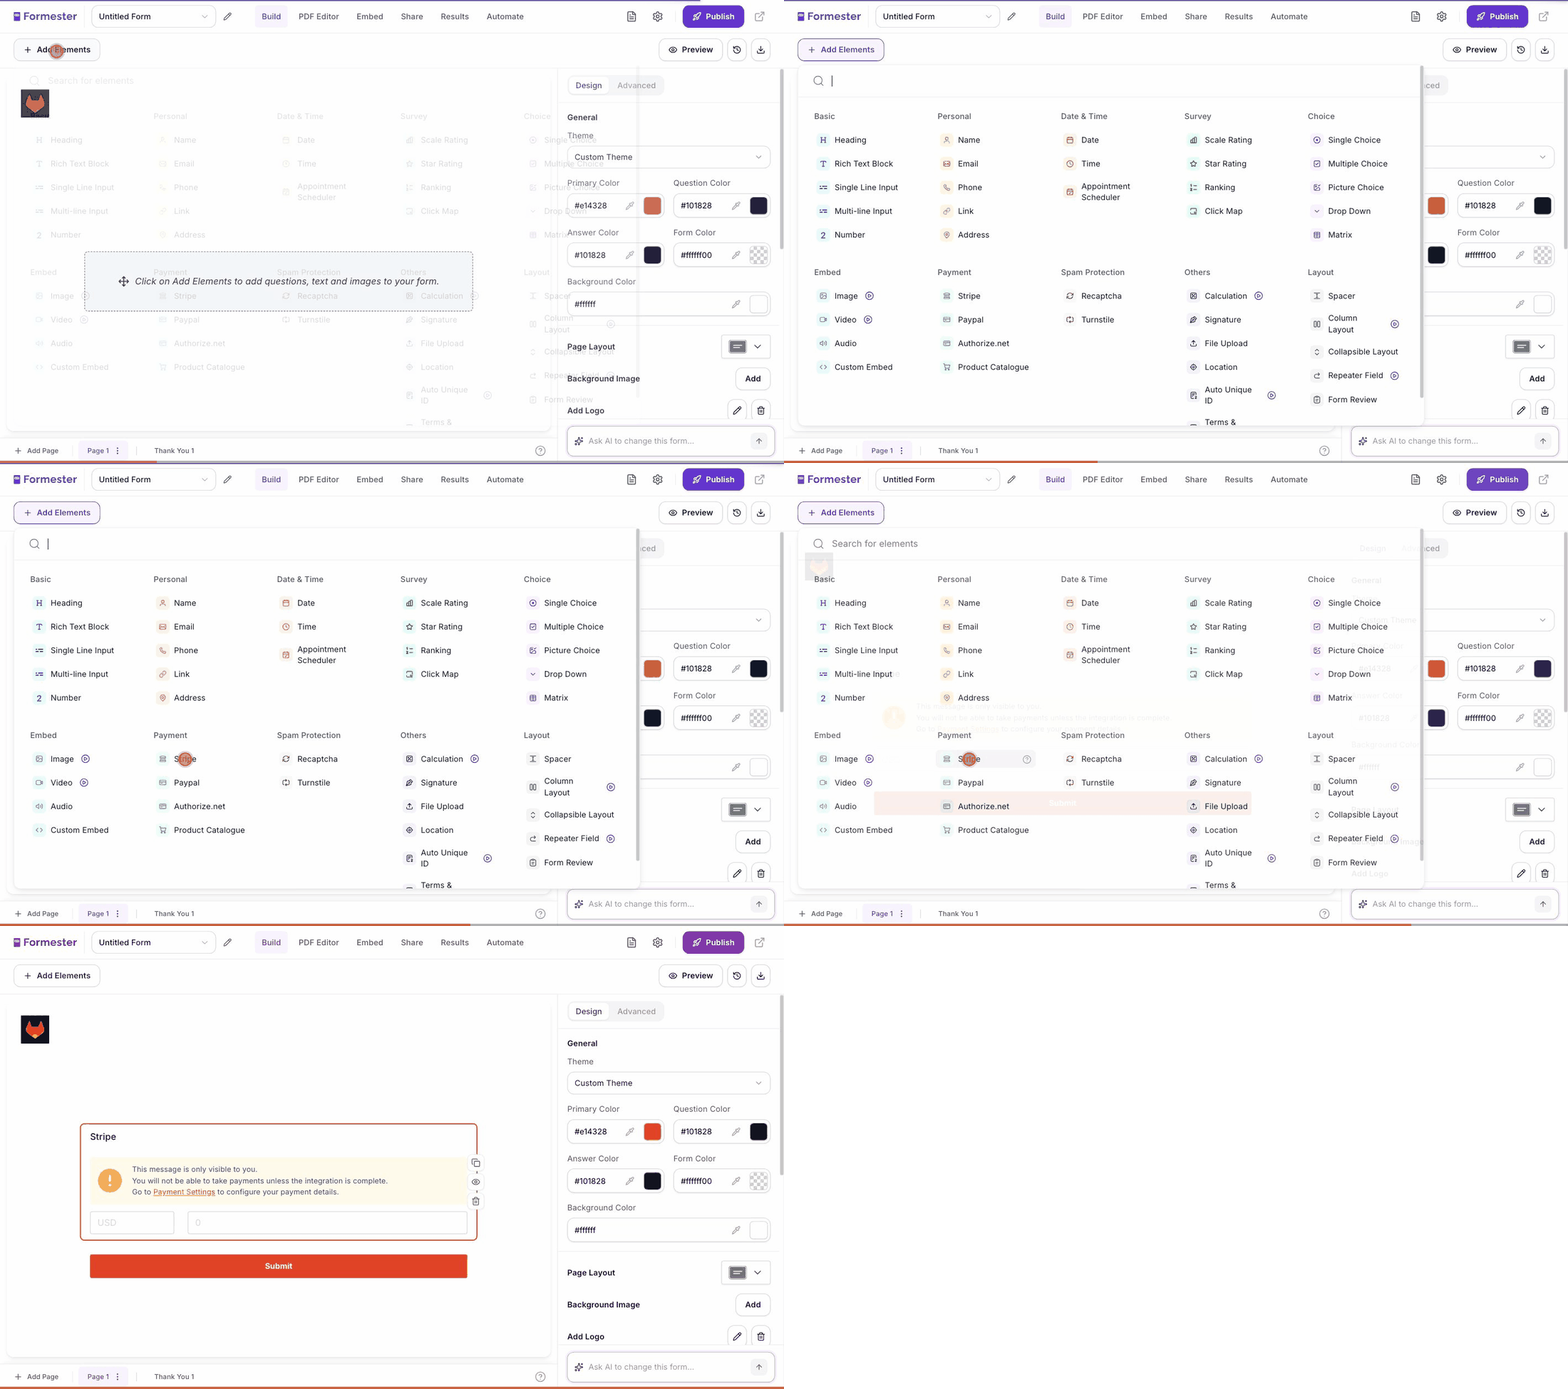
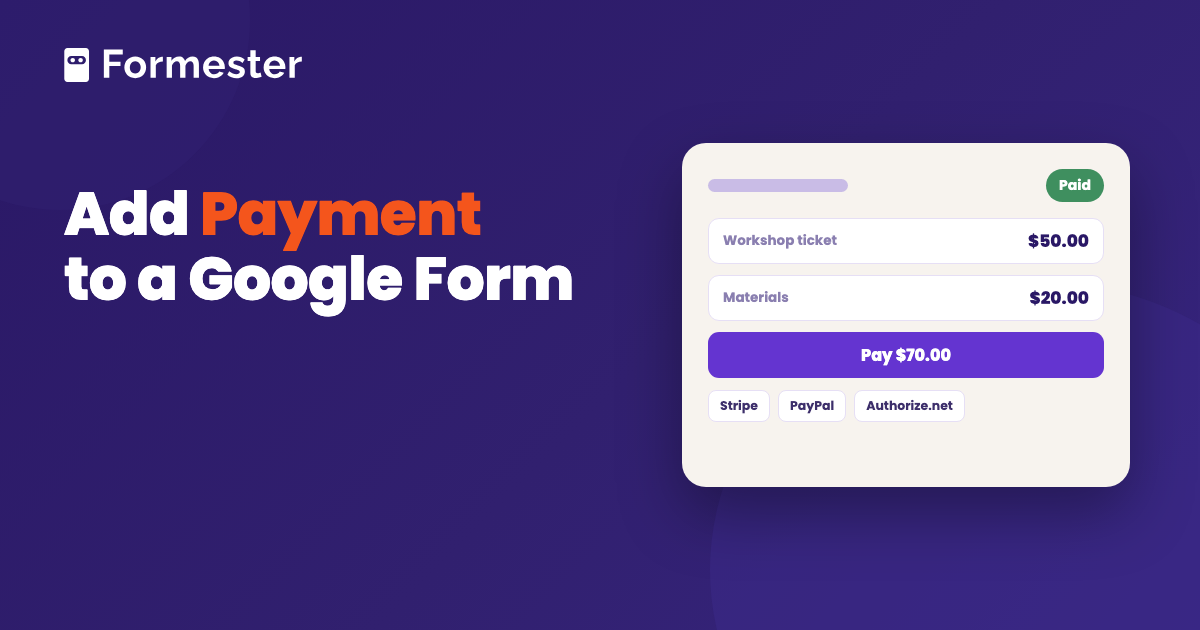
If the money matters more than staying on Google Forms, the cleaner answer is a form that takes payment natively. Formester adds a payment element to any form, connected to Stripe, PayPal or Authorize.net, so respondents pay as part of submitting rather than afterwards. The payment sits with the response, which removes the reconciliation step entirely.
Checkout is PCI compliant and Formester adds no fees of its own on top of your gateway's standard processing rate. Payments work on the free plan. If you are building something closer to a shop, our guide to order forms in Google Forms covers the pricing side, and a ready-made template is a faster starting point than a blank builder.
Take the payment on the form, not after it
Connect Stripe, PayPal or Authorize.net, drop a payment field onto the form, and collect the money with the response. No fees added by Formester.
Try Formester freeFree forever · No credit card · 56,000+ teams
Related reading
- Link Google Sheets to Google Forms, which is where you reconcile payments by hand if you use the link method.
- Payment form templates and order form templates, if you would rather start from a working form.